Squash and Stretch a Mesh Along a Spline in Unreal Engine
How to make a mesh squash, stretch, and bend as it travels along an editable spline in Unreal Engine using World Position Offset, so the geometry follows the curve while the actor transform and collision never move.
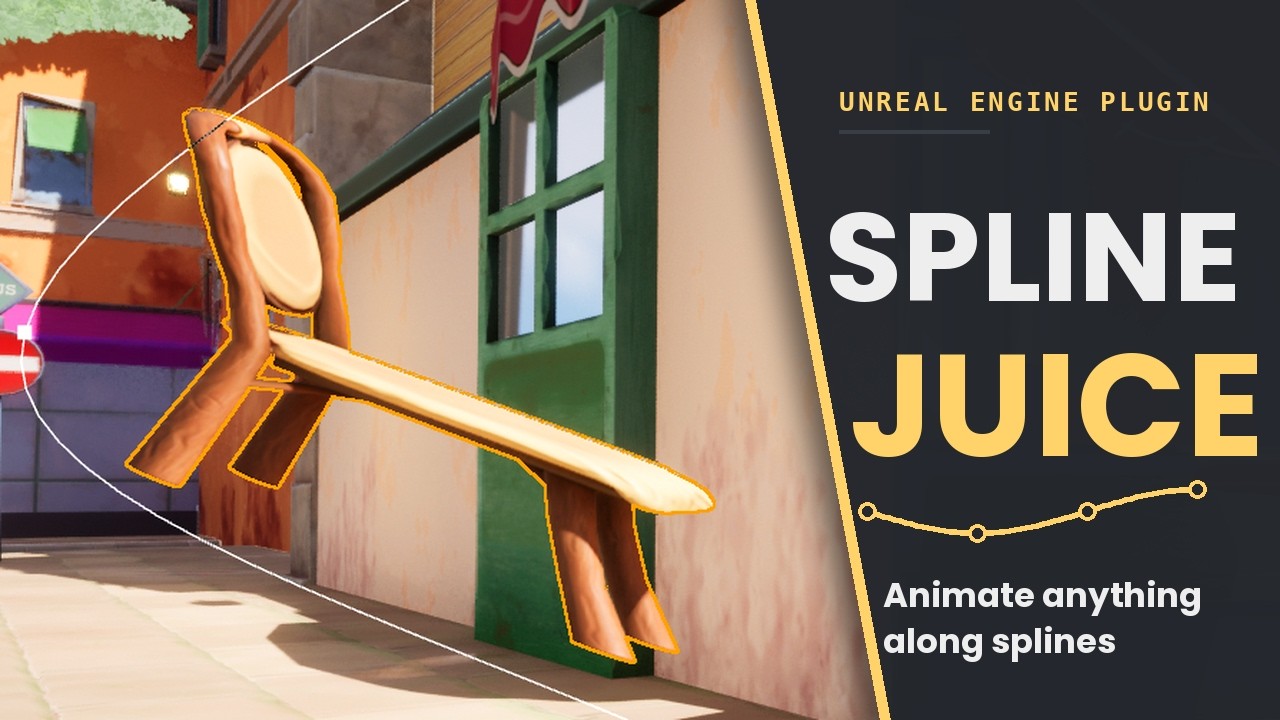
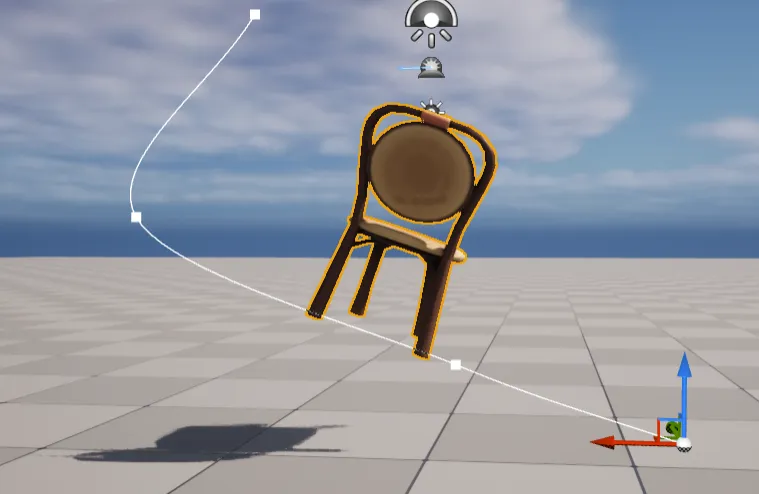
Cartoon “juice” is that squash-and-stretch you see when a pickup pops out of a chest, a projectile leans into its arc, or a coin stretches as it flies to the HUD. The motion sells the weight, and it almost always happens along a path. This post is a build-along: by the end you will have bent, squashed, and stretched a mesh as it travels a spline, without ever moving the actor, its transform, or its collision.
I consider this an intermediate guide. You should be comfortable reading a material graph, writing a Custom node, and feeding values from C++ or Blueprint into a material. I will give you the real shape of every piece: the C++ that bakes the spline, the parameter contract between code and material, and a trimmed shader body you can paste into a Custom node. The snippets are simplified for clarity (the production versions add edge-case armor I will flag as we go), but the math is the real math. The interesting part is that none of the motion is “real”: the actor stays put and the entire effect lives in the material, driven by an editable spline. That keeps it cheap, fully reversible, and safe to put on anything.
Why World Position Offset, not transforms or spline meshes
The first instinct is to move the actor or rotate the mesh along the spline every frame. That works, but now your collision, your gameplay queries, and anything parented to the actor are all dragging along with a purely cosmetic flourish. A projectile that “leans” into its arc should not have leaning collision.
The second instinct is USplineMeshComponent, the built-in spline mesh. It is
great for static geometry like roads and pipes, but it bakes the deformation into
the component and is not built for animating a mesh travelling along a path with
squash and stretch on top.
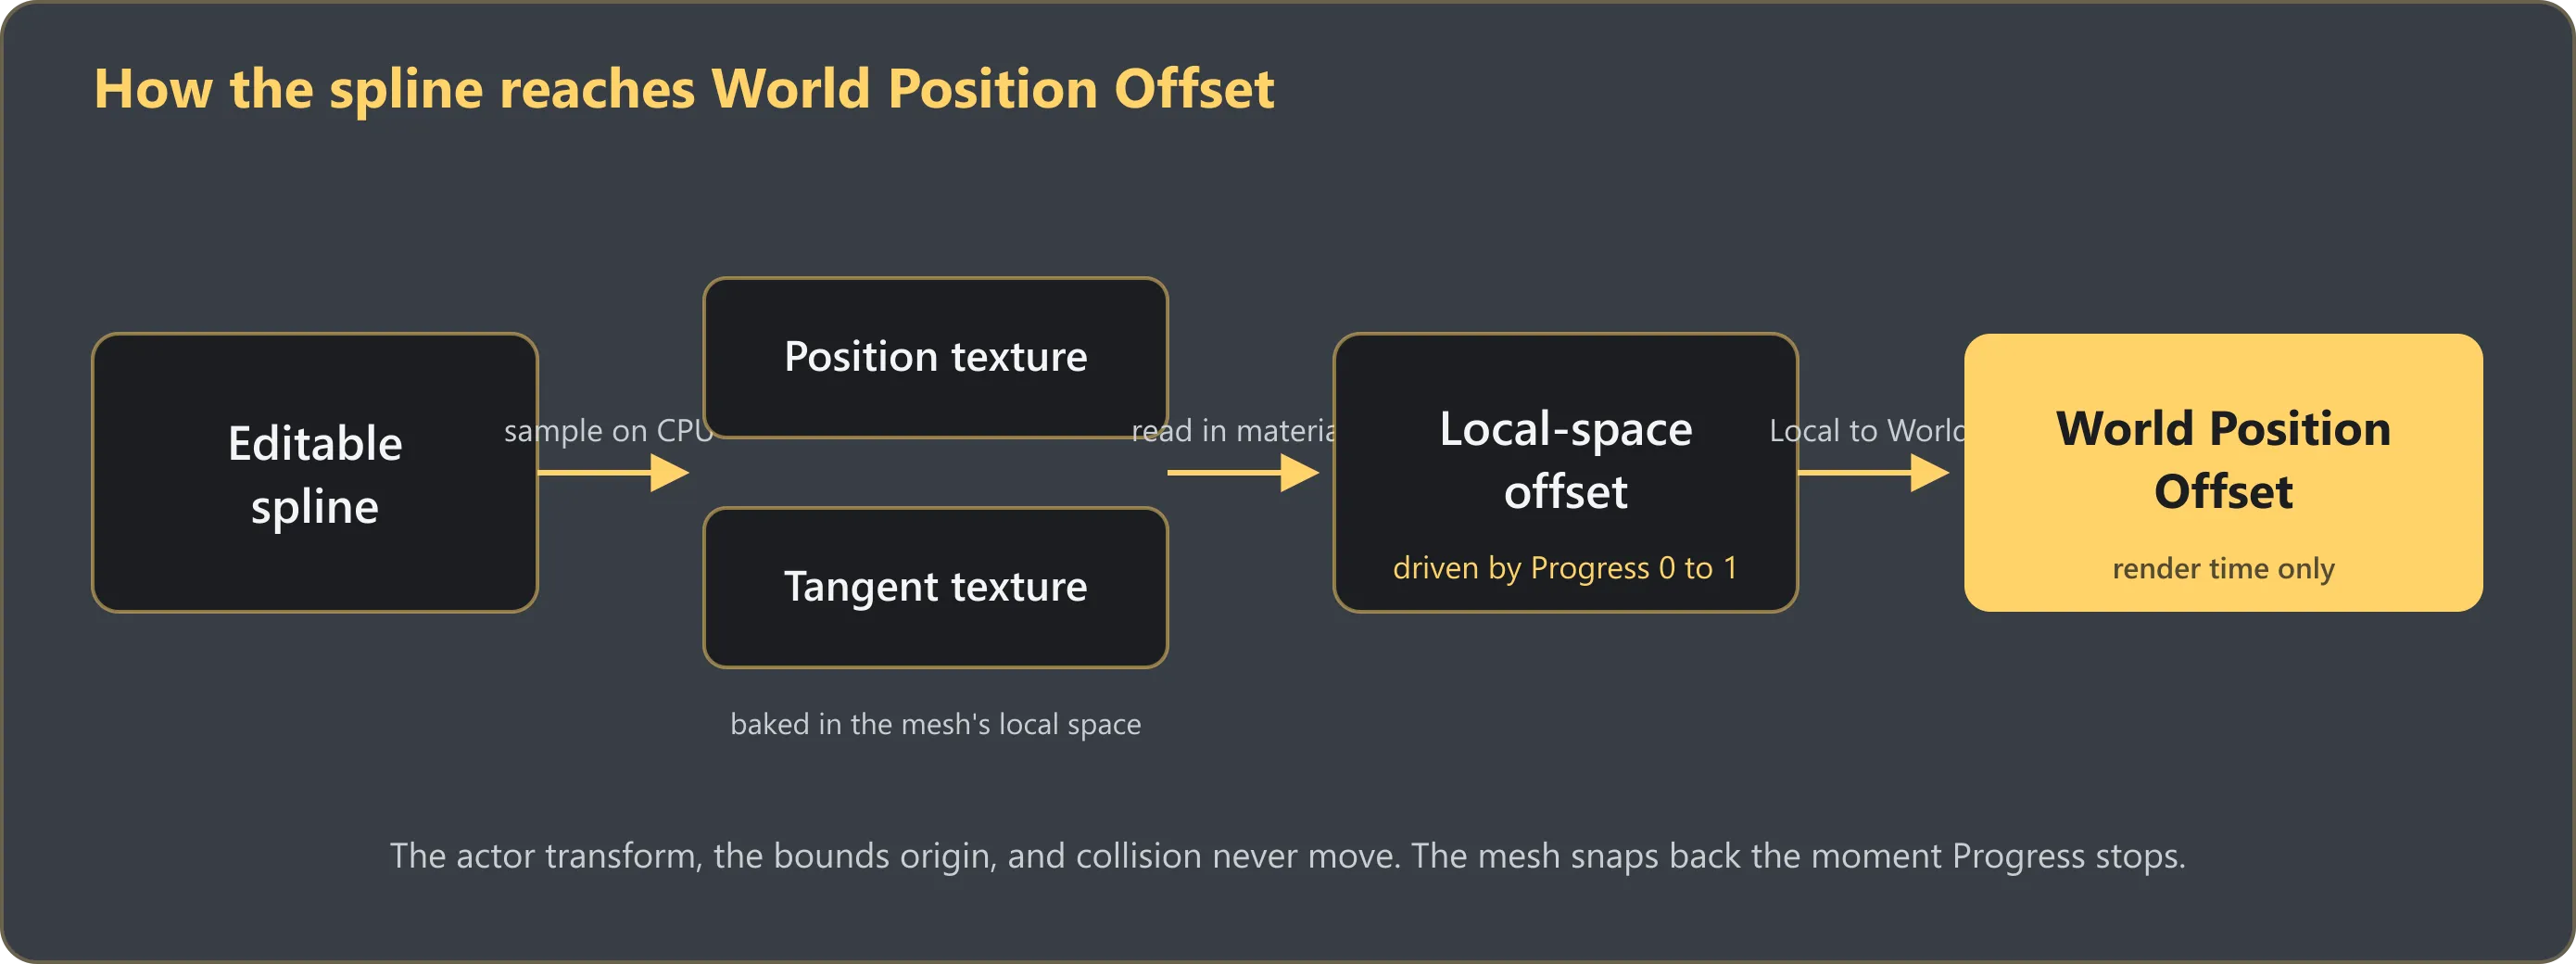
So we reach for World Position Offset instead. WPO moves vertices in the material at render time only. The mesh component, its bounds origin, and its collision all stay exactly where they were, and the moment we stop driving the effect the mesh snaps back to normal. The whole thing is a visual lie told by the shader, which is precisely what we want for juice.
How the spline drives the deformation
A material cannot read a USplineComponent directly, so we have to hand it the
spline in a form a shader understands. The trick is to sample the spline on the
CPU and write the result into a texture.
Sampling the spline into a texture
We walk the spline at evenly spaced points and, at each one, record two things:
the position and the forward tangent. We pack those into a pair of small 1D
textures (a PF_A32B32G32R32F float texture so we keep full precision), one for
position and one for the tangent. Think of the texture’s U coordinate from 0 to 1
as “distance along the spline”: U of 0 is the start, U of 1 is the end.
Two details make or break this, and both are easy to get wrong:
- Sample in the mesh’s local space, not world space. Every mesh has its own transform, bounds centre, and local length, so a shared global table would not line up. Each mesh gets its own spline textures baked for it.
- Measure the position relative to the spline’s end. A vertex sitting at the
mesh origin should rest at the end of the curve when
Progressis 1, so we store each sample as an offset from the spline’s end location. That is the difference between the mesh landing on the curve and floating off it.
Here is the bake loop, trimmed to the essentials. Spline is your
USplineComponent, Mesh is the mesh you are deforming:
const int32 SampleCount = 64; // texels along the curve; more = smoother
const float SplineLength = Spline->GetSplineLength();
const FTransform MeshToWorld = Mesh->GetComponentTransform();
const FVector EndWorld = Spline->GetLocationAtDistanceAlongSpline(
    SplineLength, ESplineCoordinateSpace::World);

TArray<FLinearColor> PositionPixels, TangentPixels;
PositionPixels.SetNumUninitialized(SampleCount);
TangentPixels.SetNumUninitialized(SampleCount);

for (int32 i = 0; i < SampleCount; ++i)
{
    const float Alpha = (float)i / (float)(SampleCount - 1); // 0..1 along the spline
    const float Distance = SplineLength * Alpha;

    const FVector WorldPos = Spline->GetLocationAtDistanceAlongSpline(
        Distance, ESplineCoordinateSpace::World);
    const FVector WorldTangent = Spline->GetDirectionAtDistanceAlongSpline(
        Distance, ESplineCoordinateSpace::World);

    // Local space, measured from the spline END (see detail 2 above).
    const FVector LocalPos = MeshToWorld.InverseTransformVector(WorldPos - EndWorld);
    const FVector LocalTangent =
        MeshToWorld.InverseTransformVectorNoScale(WorldTangent).GetSafeNormal();

    // Stash Alpha in the position texture's alpha channel; it is handy for debugging.
    PositionPixels[i] = FLinearColor(LocalPos.X, LocalPos.Y, LocalPos.Z, Alpha);
    TangentPixels[i]  = FLinearColor(LocalTangent.X, LocalTangent.Y, LocalTangent.Z, 1.0f);
}
Create the textures as transient, uncompressed full-float, with bilinear filtering so the shader gets smooth interpolation between texels:
UTexture2D* Tex = UTexture2D::CreateTransient(SampleCount, 1, PF_A32B32G32R32F);
Tex->CompressionSettings = TC_VectorDisplacementmap; // no compression, keep full float
Tex->SRGB = false;
Tex->Filter = TF_Bilinear;
Tex->AddressX = TA_Clamp;
Tex->UpdateResource();
Then upload the pixel array with a standard lock / Memcpy / unlock on
PlatformData->Mips[0].BulkData, and call UpdateResource() once more. Re-run the
whole bake whenever the spline is edited or the mesh transform changes.
What production adds: the shipping component also accumulates the true local arc length while it samples (summing distances between consecutive local points) rather than trusting the world-space length, and it expands the mesh’s render bounds so WPO does not get culled. We will skip both here; they do not change the core idea.
The contract between code and material
Code and shader talk through a fixed set of named parameters. Expose exactly these on your material (as scalar / vector / texture parameters) and have your component push them every frame. These are the names I will use in the shader below:
| Parameter | Type | What it carries |
|---|---|---|
SplineJuice_PositionTexture | Texture | the baked curve positions (local space) |
SplineJuice_TangentTexture | Texture | the baked curve tangents |
SplineJuice_Progress | Scalar | the playhead, 0 to 1 |
SplineJuice_SplineLength | Scalar | the spline’s local arc length |
SplineJuice_SampleCount | Scalar | texel count (for the half-texel inset) |
SplineJuice_MeshCenterLocal | Vector | the mesh bounds centre, local space |
SplineJuice_ForwardAxisLocal | Vector | the axis the mesh “leads” with |
SplineJuice_StretchScale | Scalar | squash/stretch amount along forward |
SplineJuice_PreserveVolume | Scalar | 0 or 1 toggle |
Progress is the heart of it: the playhead that says where along the spline this
mesh currently sits. Animate it from 0 to 1 and the whole mesh slides along the
curve. The position sample tells each vertex where on the curve it should be; the
tangent sample tells us which way the curve points there, so we can bank the vertex
to follow the curve instead of sliding along stiff as a board.
Reading it back in the material
Drop a Custom node into your material, give it inputs for the parameters above
plus LocalPosition (the vertex’s local-space position), set its output to
CMOT Float3, and include your shader file as the body:
#include "/YourPlugin/SplineJuiceDeform.ush"A quick note on the .ush: it is just a file of HLSL that Unreal pastes into the
Custom node’s generated function at compile time (you map a virtual path like
/YourPlugin/ to your plugin’s Shaders/ folder in your module’s startup). Why a
file instead of typing the HLSL straight into the node? Two reasons. The
motion-vector fix later needs the exact same code evaluated twice, and a shared
include means one source of truth instead of two nodes drifting apart. And it is
diffable and version-controlled like real code.
One hard rule comes with this: the file must be expression-body HLSL with no
top-level functions. Unreal wraps your include inside its own generated function,
so a float helper() { ... } in the file nests a function inside a function and
fails to compile. Everything stays inline, top to bottom, ending in a return.
Here is that .ush, trimmed to the core. It returns a local-space offset; a
tiny material function downstream transforms it to world space and feeds
World Position Offset (more on that in a second):
// --- Sanitize, then build an orthonormal frame around the forward axis ---
float Progress     = saturate(SplineJuice_Progress);
float SplineLength = max(SplineJuice_SplineLength, 0.001);
float Stretch      = max(SplineJuice_StretchScale, 0.01);

float3 Forward = normalize(SplineJuice_ForwardAxisLocal);
float3 RefUp   = abs(Forward.z) > 0.95 ? float3(0,1,0) : float3(0,0,1); // dodge gimbal
float3 Right   = normalize(cross(RefUp, Forward));
float3 Up      = cross(Forward, Right);

// --- Decompose the vertex (relative to mesh centre) onto that frame ---
float3 FromCentre = LocalPosition - SplineJuice_MeshCenterLocal;
float  Along = dot(FromCentre, Forward); // distance down the body
float  RightAmt = dot(FromCentre, Right);
float  UpAmt    = dot(FromCentre, Up);

// --- Squash & stretch: scale along forward, shrink perpendicular by 1/sqrt(stretch)
//     so volume holds. THIS one line is the whole "juice". ---
float PerpScale      = lerp(1.0, rsqrt(Stretch), SplineJuice_PreserveVolume);
float StretchedAlong = Along * Stretch;
float SquashedRight  = RightAmt * PerpScale;
float SquashedUp     = UpAmt    * PerpScale;

// --- Map the vertex to an arc-length position on the spline and sample it.
//     Half-texel inset so we read texel centres, not edges. ---
float Count = max(SplineJuice_SampleCount, 2.0);
float Dist  = clamp(Progress * SplineLength + StretchedAlong, 0.0, SplineLength);
float U     = lerp(0.5/Count, 1.0 - 0.5/Count, Dist / SplineLength);

float3 PathPos = Texture2DSampleLevel(SplineJuice_PositionTexture,
    SplineJuice_PositionTextureSampler, float2(U, 0.5), 0).rgb;
float3 Tangent = normalize(Texture2DSampleLevel(SplineJuice_TangentTexture,
    SplineJuice_TangentTextureSampler, float2(U, 0.5), 0).rgb);

// --- Re-orient the squashed cross-section to the curve tangent, then rebuild
//     the vertex on the curve and return it as a local offset. ---
float3 BentRight = normalize(cross(float3(0,0,1), Tangent));
float3 BentUp    = cross(Tangent, BentRight);
float3 Deformed  = SplineJuice_MeshCenterLocal + PathPos
                 + BentRight * SquashedRight + BentUp * SquashedUp;

return Deformed - LocalPosition;
That is genuinely the whole deformer. Animate Progress and the mesh travels;
raise StretchScale and it stretches along its lead axis while pinching in on the
other two.
What production adds: three things, all about robustness rather than the core idea. (1) The naive
cross(float3(0,0,1), Tangent)reorientation twists the mesh and flips when the tangent goes near-vertical; the shipping shader uses minimal-rotation parallel transport (Rodrigues’ rotation) from the rest frame to the tangent frame, which has no twist and no flip. (2) When a vertex’s stretched position overshoots either end of the spline, production extends it straight out along the tangent instead of piling it up at the clamp. (3) AsmoothstepnearProgress = 1eases the offset to zero so the mesh settles exactly back into its authored pose at the end of travel. None of those change what you see in the common case; they stop the edge cases from looking broken.
A note on why this is a local offset rather than the final WPO: the deform math
is cleanest in the mesh’s own space, but World Position Offset wants a world-space
vector. So the Custom node returns the local offset, and a small material function
wraps it: transform the offset to world space, optionally add any existing WPO the
material already had, and that connects to the World Position Offset pin.
Adding the squash and stretch
Travel alone looks robotic. The life comes from deforming the body while it moves, and we already wrote most of it above. Let me unpack the two lines that matter.
Stretch along the travel axis
StretchedAlong = Along * Stretch is the whole stretch. Along is how far down the
forward axis a vertex sits, so multiplying it by Stretch elongates the mesh into
its motion like a droplet when Stretch > 1, and pancakes it when Stretch < 1.
Because every vertex knows its own Along, you can go further and make the stretch
lean harder at the front or the back (feed Stretch through a function of Along)
rather than scaling uniformly. That asymmetry is what reads as cartoon weight
instead of a boring uniform scale.
Preserving volume so it does not balloon
If you only stretch one axis the mesh visibly gains or loses volume, and the
illusion breaks. That is the PerpScale = rsqrt(Stretch) line. The reasoning: if
the forward axis scales by s, the volume scales by s too, so to hold volume each
of the two perpendicular axes must scale by 1/sqrt(s). Stretch it long
(s > 1) and the cross-section thins; squash it flat (s < 1) and it bulges out at
the sides. Same volume, believable rubber. The lerp against
SplineJuice_PreserveVolume lets you turn it off and watch the mesh balloon, which
is the clearest way to see why you want it.
Driving it all with curves
So far Progress and StretchScale are just floats. The last piece is keeping them
art-directed by driving them from editable UCurveFloat curves on the CPU side,
then pushing the evaluated result into the material. Two curves carry the feel:
- A timing curve remaps real time to
Progress. A straight diagonal is constant speed; an ease-in/ease-out shape lets the mesh roll out of the start and settle into the end. In code that is justProgress = TimingCurve->Eval(NormalizedTime). - A stretch curve maps
Progressto a stretch alpha, so the mesh stretches most mid-journey and relaxes at the ends. The shipping evaluator is a one-liner over a curve seeded as a hump (0 at the ends, 1 in the middle):
float StretchAlpha = StretchCurve->Eval(Progress);          // 0..1 from the curve
float StretchScale = 1.0f + (MaxStretchScale - 1.0f) * StretchAlpha; // 1 at rest
Once the motion is curve-driven, tuning the feel is dragging keys around in the curve editor, not recompiling anything. The video below is exactly that: dragging the stretch curve while the mesh responds live.
The gotchas nobody mentions
This is the part that turns a fun afternoon into a long week, and it is worth knowing before you start.
Motion vectors and ghosting. Because the movement happens in the material, the engine’s velocity pass does not know the mesh moved. Under TAA or TSR that means smearing and ghosting trails behind anything driven by WPO, since the temporal filter thinks the pixels are stationary. It is easy to forget and miserable to debug, because everything looks right until the camera moves.
The fix is to evaluate the deform twice: once with this frame’s values, and
once with last frame’s. You include the same .ush in a second Custom node fed by
a parallel set of Prev parameters, and route the two results through a
PreviousFrameSwitch node before the local-to-world transform. That node hands the
engine’s velocity pass the previous-frame offset, so motion vectors come out
correct and the trails vanish. All your component has to do is remember last
frame’s scalars and push them alongside the live ones:
Mat->SetScalarParameterValue("SplineJuice_Progress",      Progress);
Mat->SetScalarParameterValue("SplineJuice_PrevProgress",  PrevProgress);
// ...same pairing for StretchScale, SizeScale, and anything else that animates.
PrevProgress = Progress; // remember for next frame
One subtlety worth stealing: when Progress jumps discontinuously (a loop wrapping
from 1 back to 0, or a designer scrubbing the playhead), push the current value as
the “prev” so the implied velocity is zero. Otherwise you get a smear across the
seam every loop.
Wrapping up
That is the whole technique: sample the spline into a position and tangent texture
in the mesh’s local space, drive a Progress playhead through it in the material,
rotate each vertex to follow the tangent, then squash and stretch along the forward
axis with volume preserved, all driven by editable curves, and all in World
Position Offset so the actor and collision never move. And mind the motion vectors,
or the travel will ghost under temporal AA.
If you would rather drop this into your project ready-made, the Spline Juice plugin packages all of this up: the spline-to-texture baking, the squash-and-stretch material, volume preservation, size over time, the bounds and motion-vector handling, and an editor setup that wires it onto any mesh with art-directable curves. You can read the full documentation or watch the walkthrough above.
Frequently asked questions
Does this move the actor’s collision? No. The entire effect is World Position Offset in the material, so the mesh component, its transform, and its collision stay exactly where they were. It is visual only and fully reversible.
Does it work on Skeletal Meshes or only Static Meshes? The technique is WPO on the mesh’s vertices, so it applies to any mesh that renders with a material you control. The clean case is a Static Mesh; a Skeletal Mesh already animated by a rig stacks WPO on top of the skinned result, which gets harder to reason about.
Can it be subtle, or is it only for cartoon effects? It is just curves and a stretch amount, so you can dial it from a heavy cartoon squash down to a barely perceptible lean. The technique does not care how strong you push it.
Does preserving volume cost more? No. The inverse scale on the perpendicular axes is a couple of math nodes per vertex; it is effectively free next to the texture samples.