Display Player Location on a Map with Render Targets in Unreal Engine
Use a Scene Capture 2D and a render target to bake a top-down map mask in Unreal Engine, draw the live player location on it with a custom depth stencil, then export it as a static texture.
This tutorial uses render targets to show the player’s location in the world. We build a top-down baker that captures the level into a render target, draws the live player position onto it, and finally bakes the whole thing out as a static texture you can reuse. If you have read Part 1 of the fog of war series, this is exactly how that walkable floor mask gets generated.
The map baker actor
We start with a Blueprint actor that will do the capturing. We add a Scene Capture Component 2D to it and rotate the component to point straight down at the floor, so it sees the level from above like a minimap.
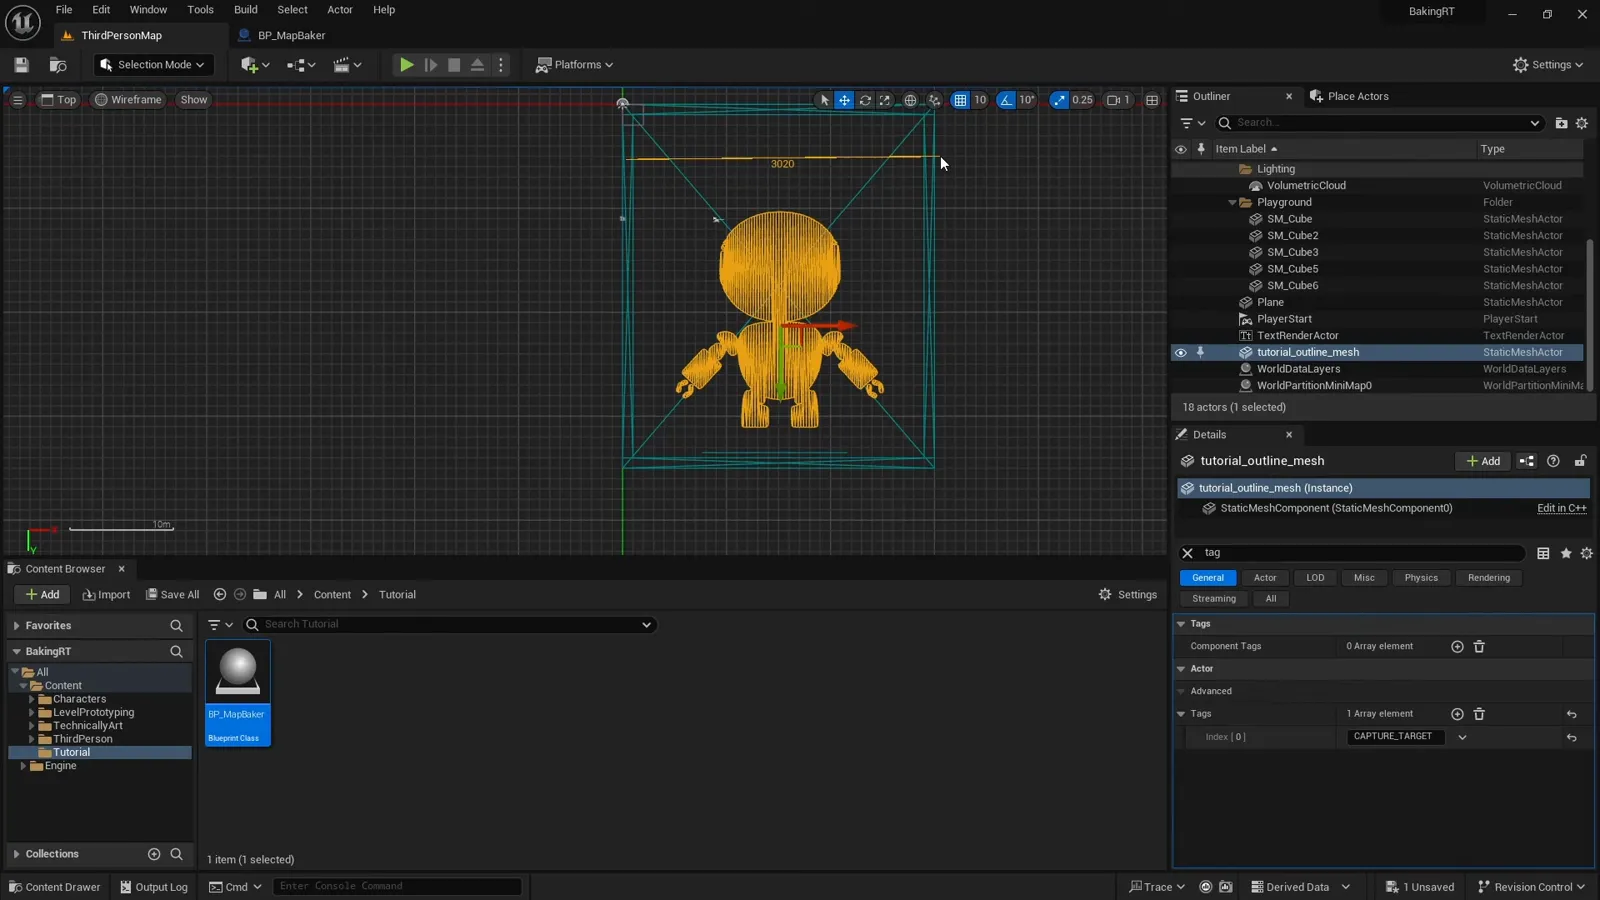
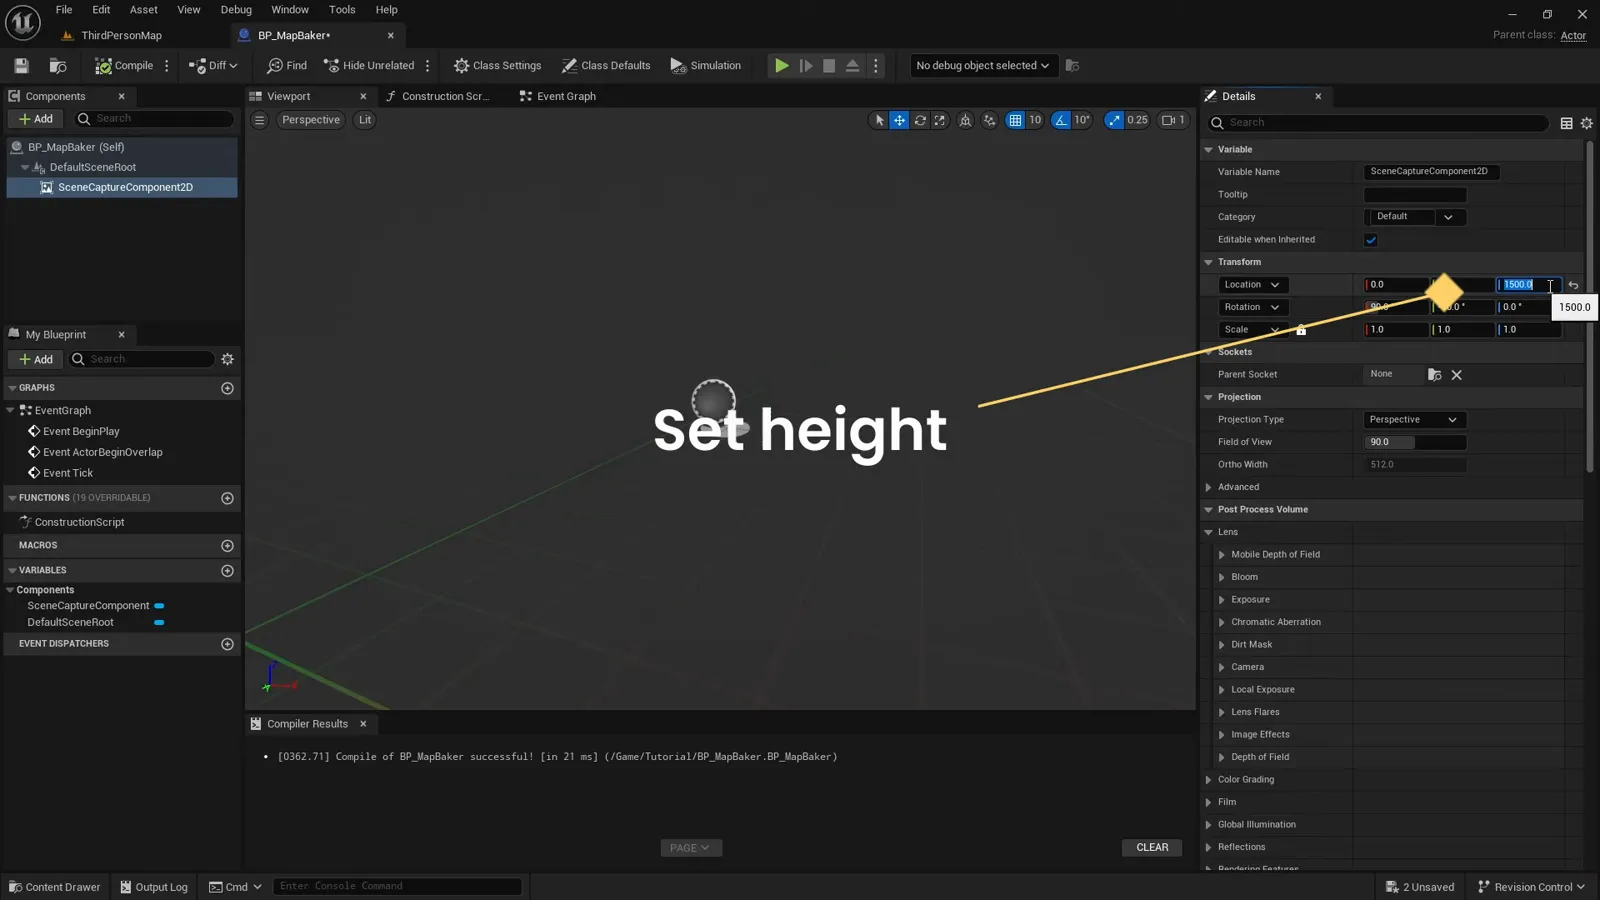
Positioning the capture over the whole level
To capture the entire world the camera has to sit high enough to frame it. We measure the scene first: here it is roughly 3000 cm wide. So we set the Scene Capture Component to 1500 cm in height, drop the Blueprint into the level, and set the actor itself to 1500 cm on its X and Y coordinates so it is centered over the map.
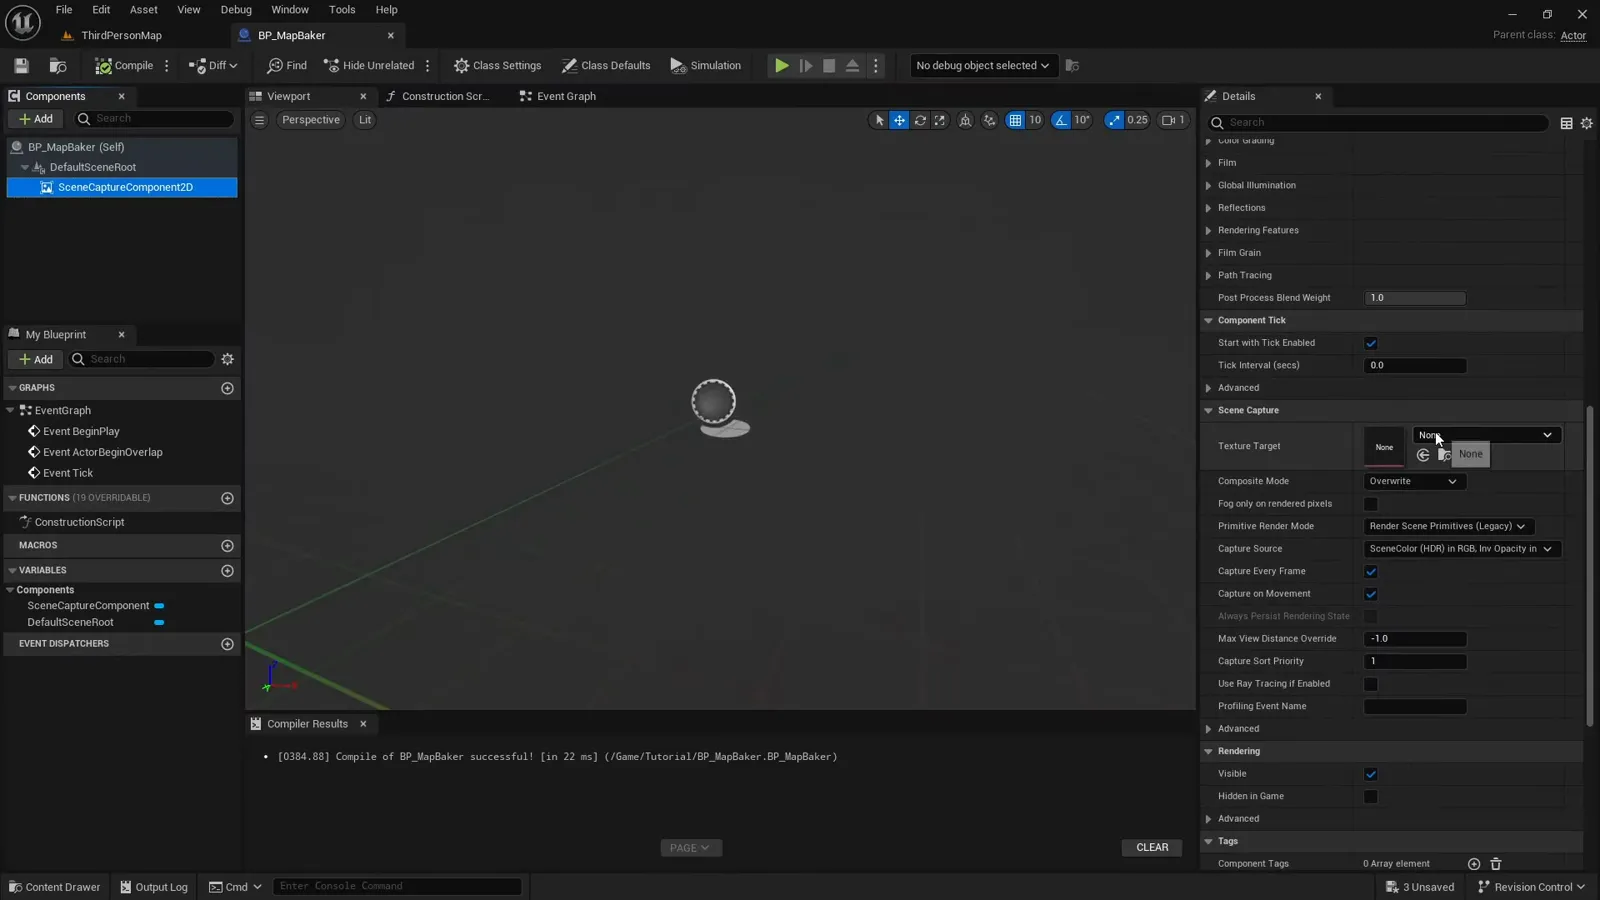
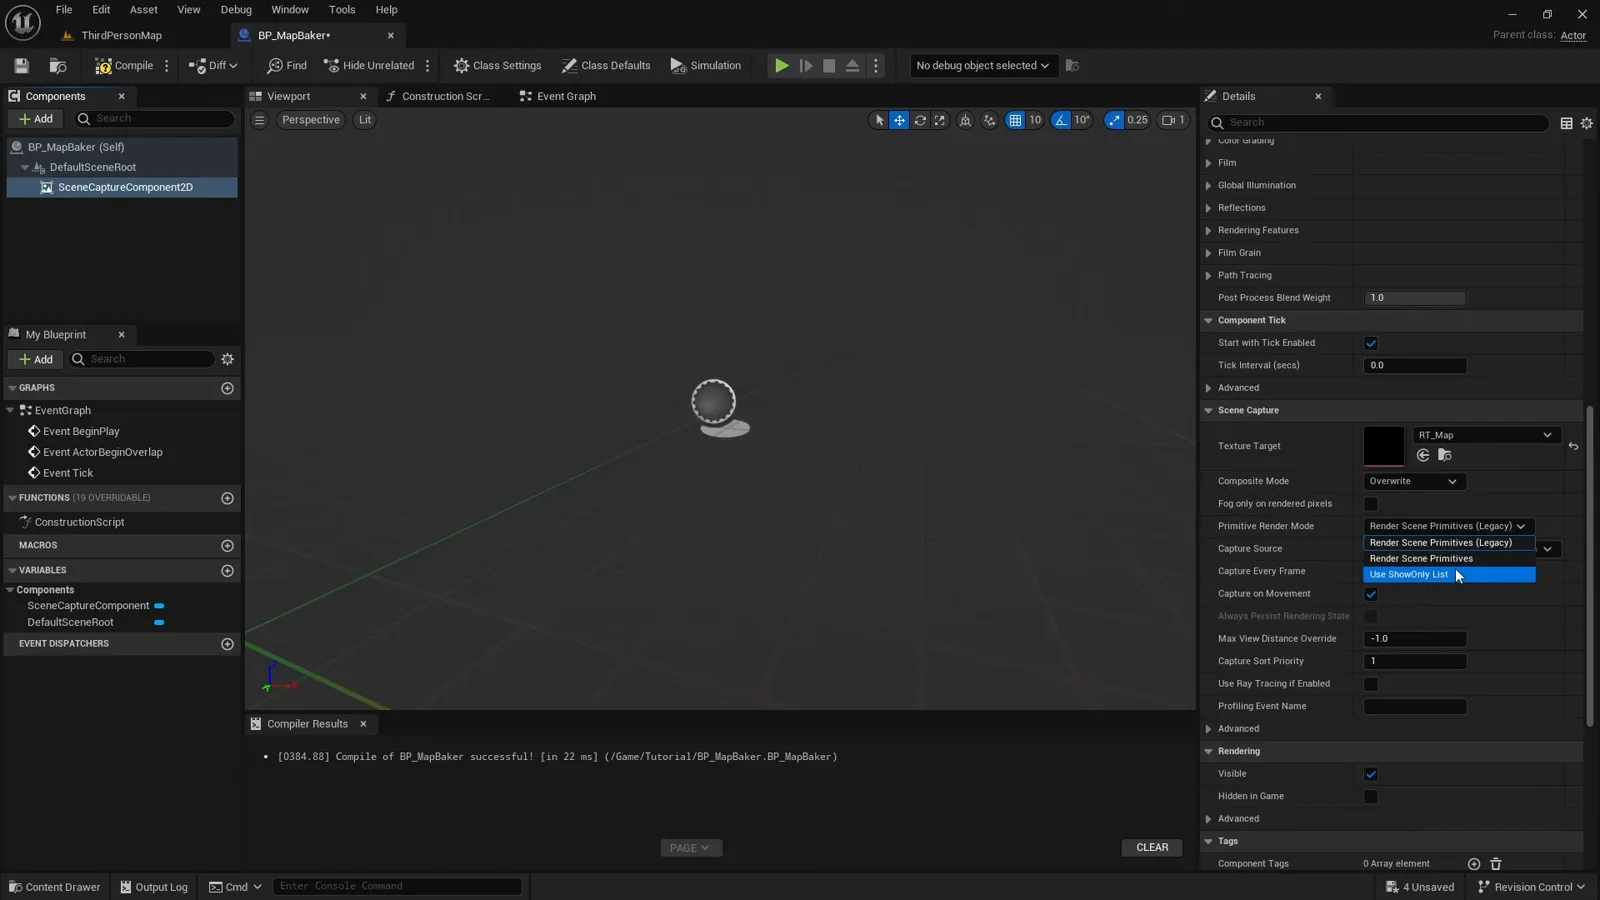
The render target
Next we create a Render Target asset and assign it as the Texture Target on the Scene Capture Component 2D. This is the texture the camera renders into every time it captures, and the texture we will read back later.
Capture only what we want
We want the capture to show only specific actors and leave the rest of the world black. So we change the Primitive Render Mode to Use ShowOnly List, and we change the Capture Source to Final Color (LDR) so a post-process material can later turn the capture into a clean black-and-white mask.
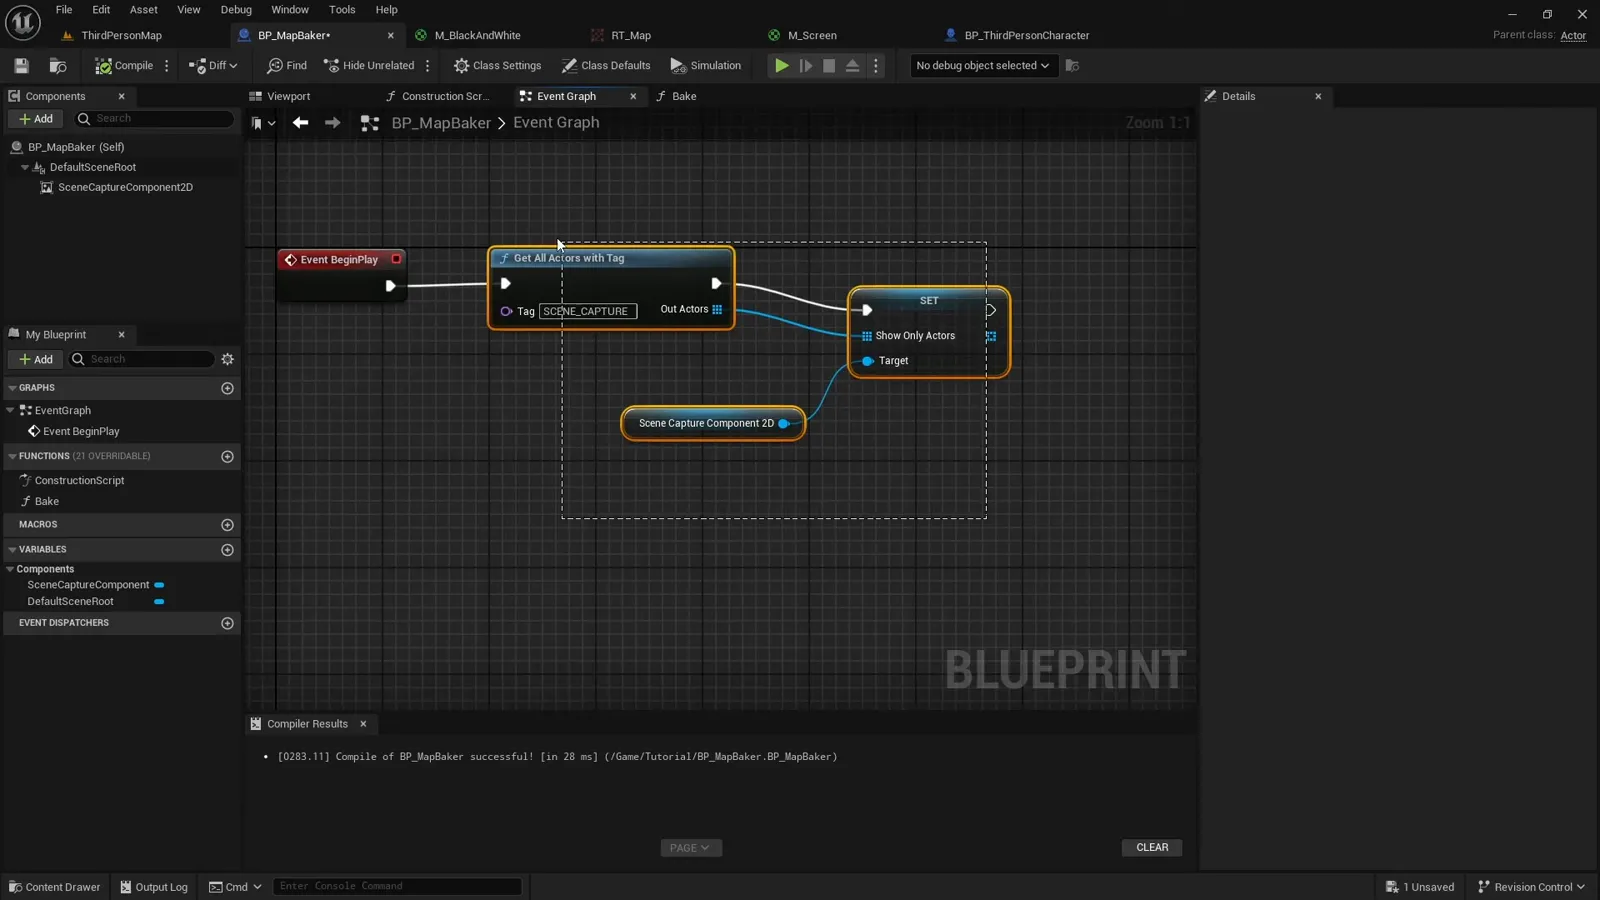
Telling the capture what to see
With a ShowOnly list, nothing is captured until we explicitly add actors to it.
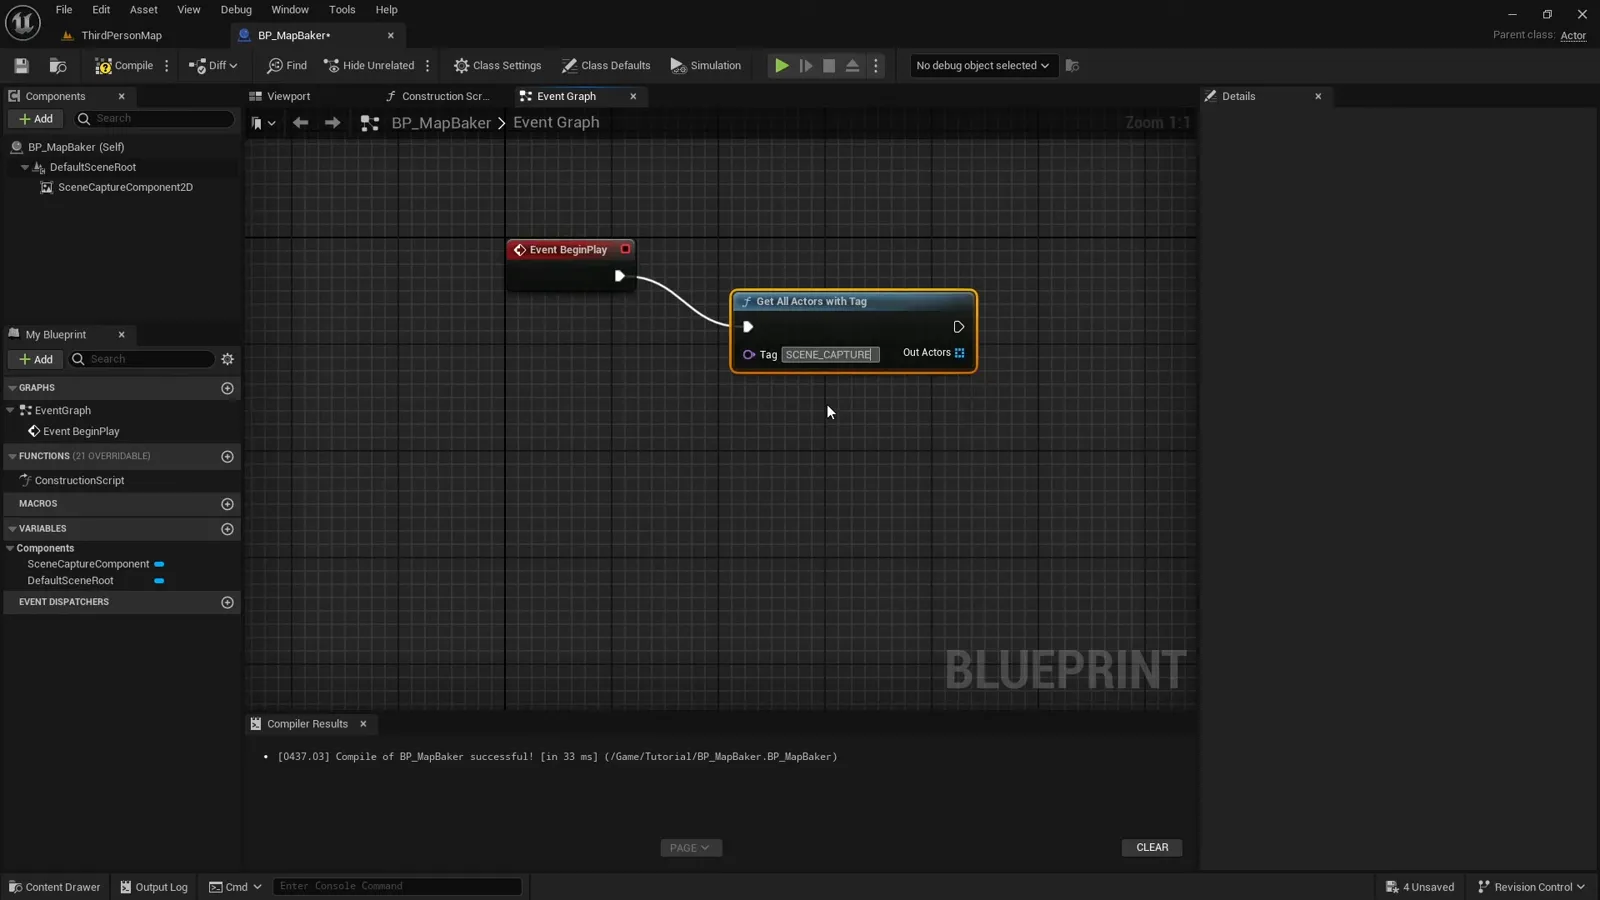
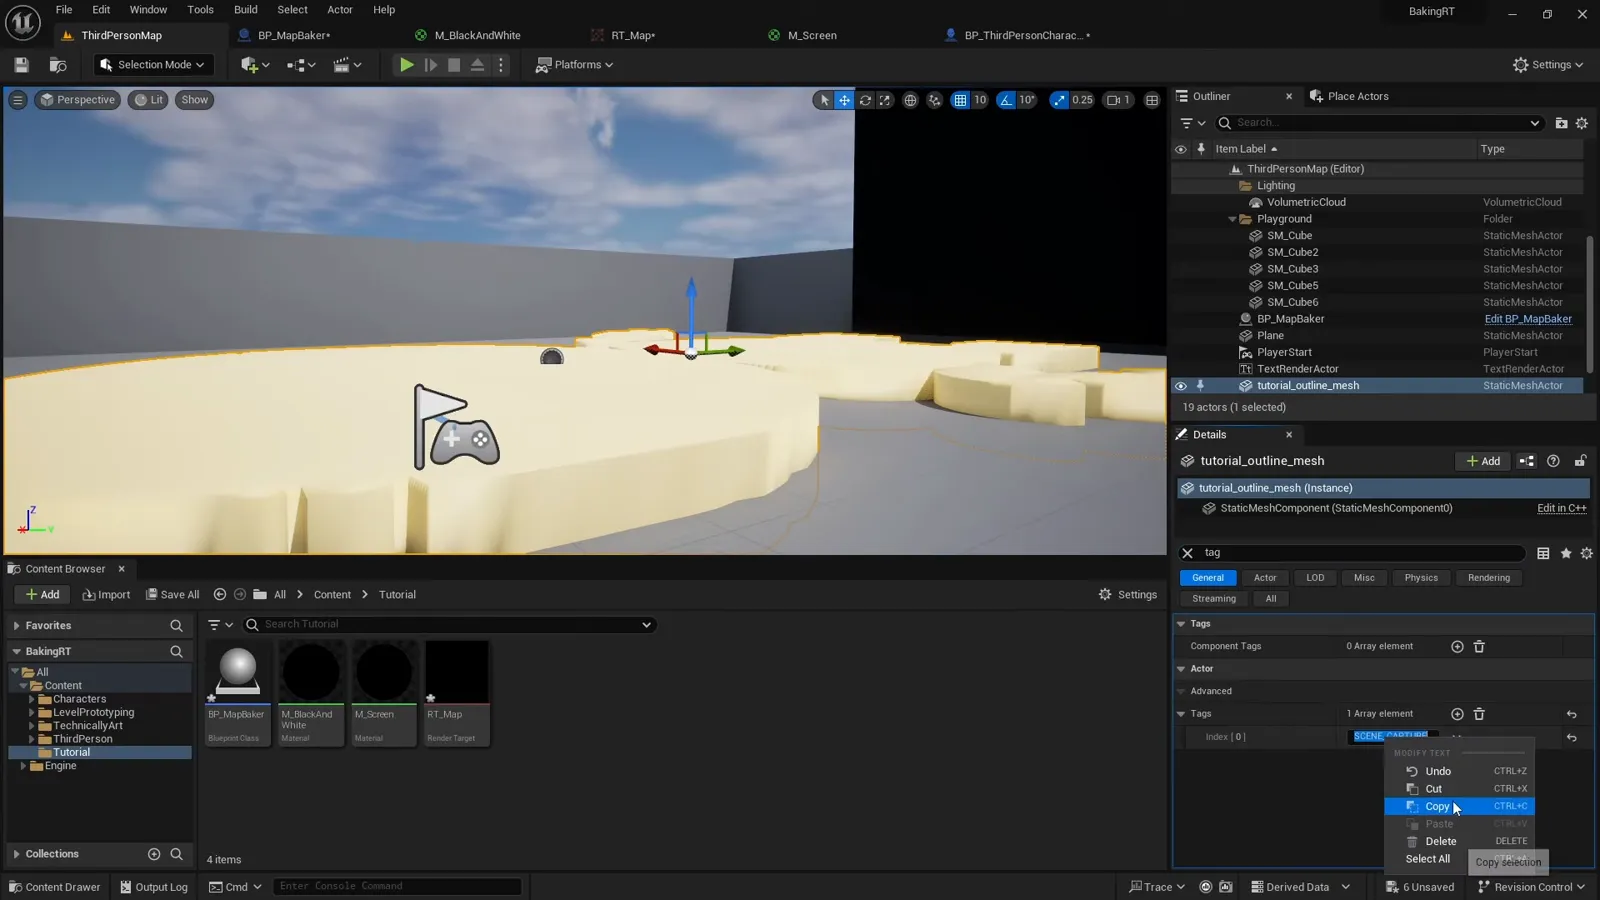
The easiest way to find the actors we care about is to give them a tag and look
them up by tag in the baker Blueprint. We mark the robot floor mesh with a
scene capture tag.
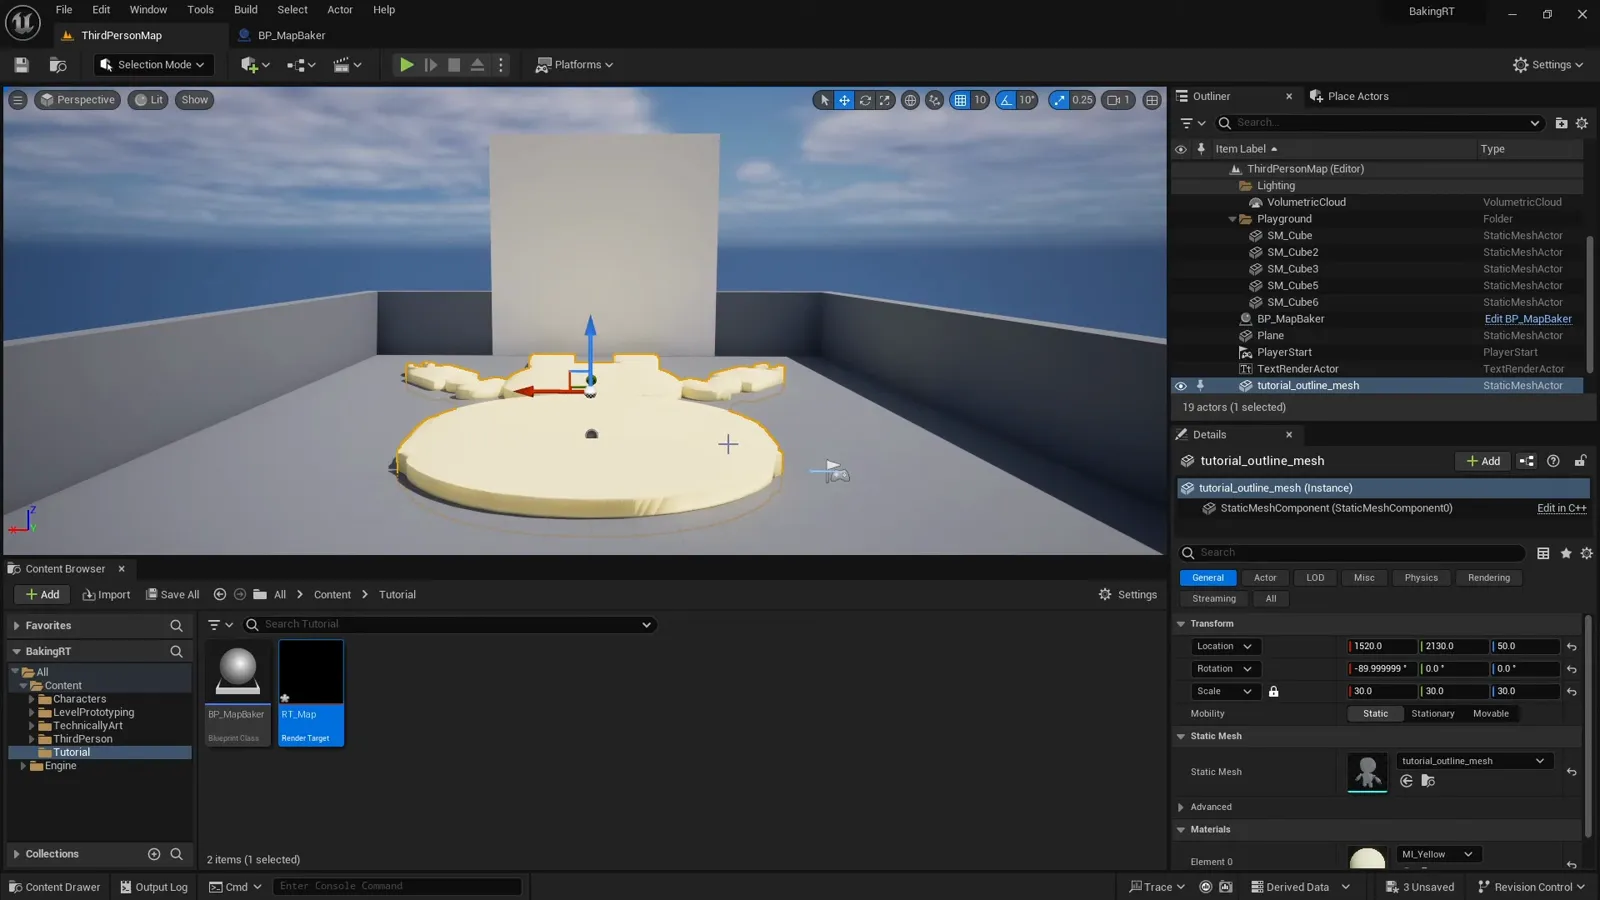
In the baker Blueprint we use that same tag to find the floor actor and set it as a ShowOnly actor on the Scene Capture Component. Now the capture sees the floor and nothing else.
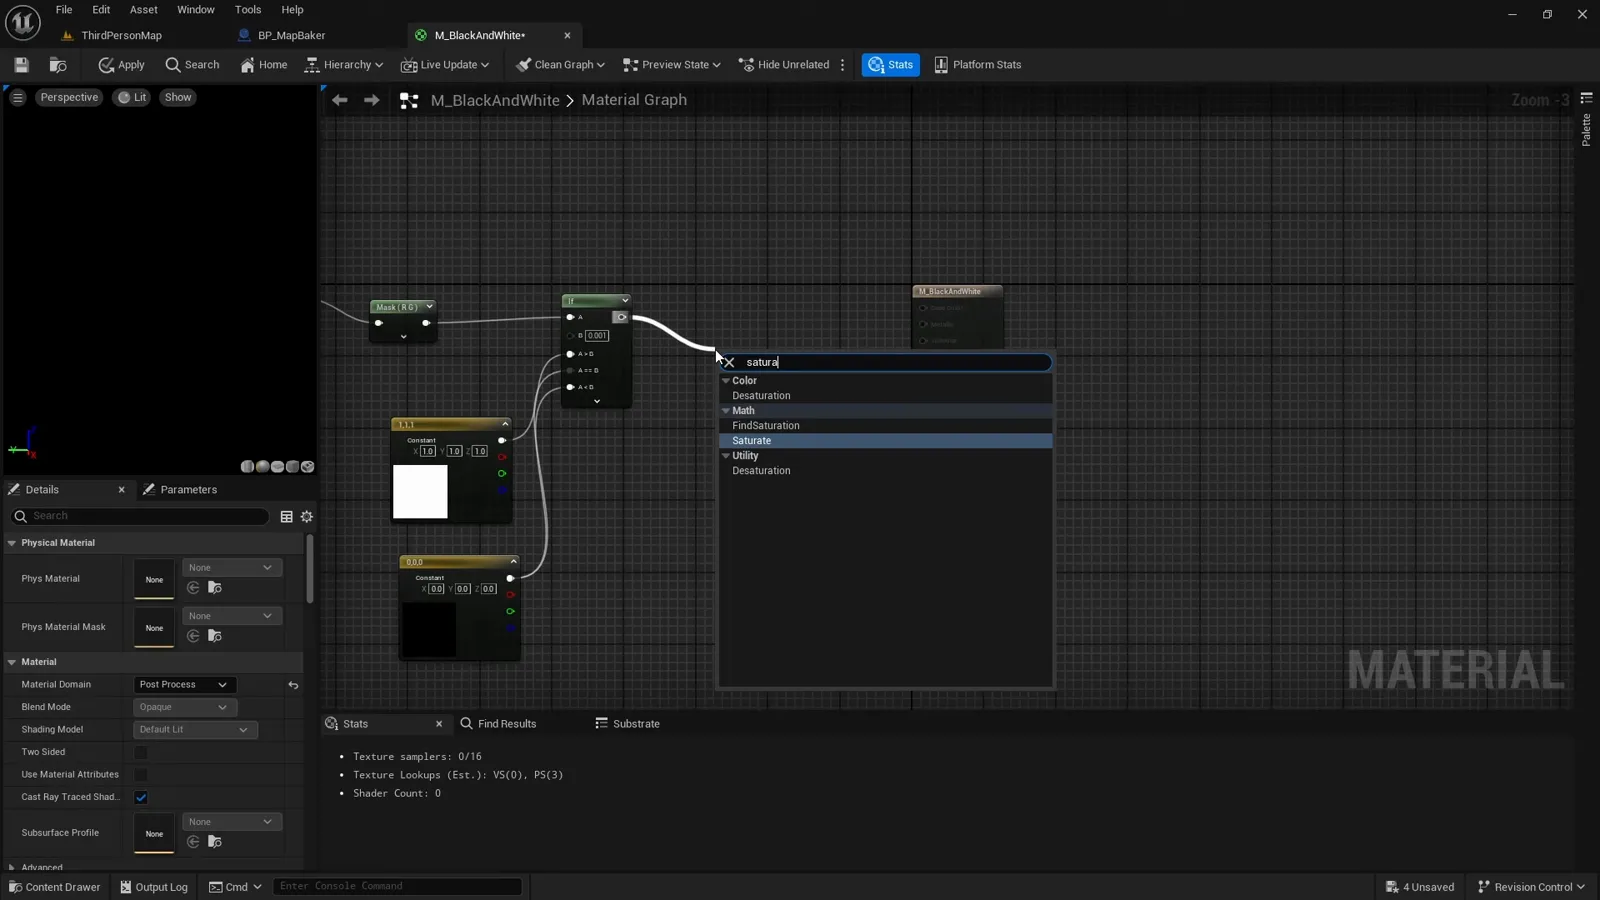
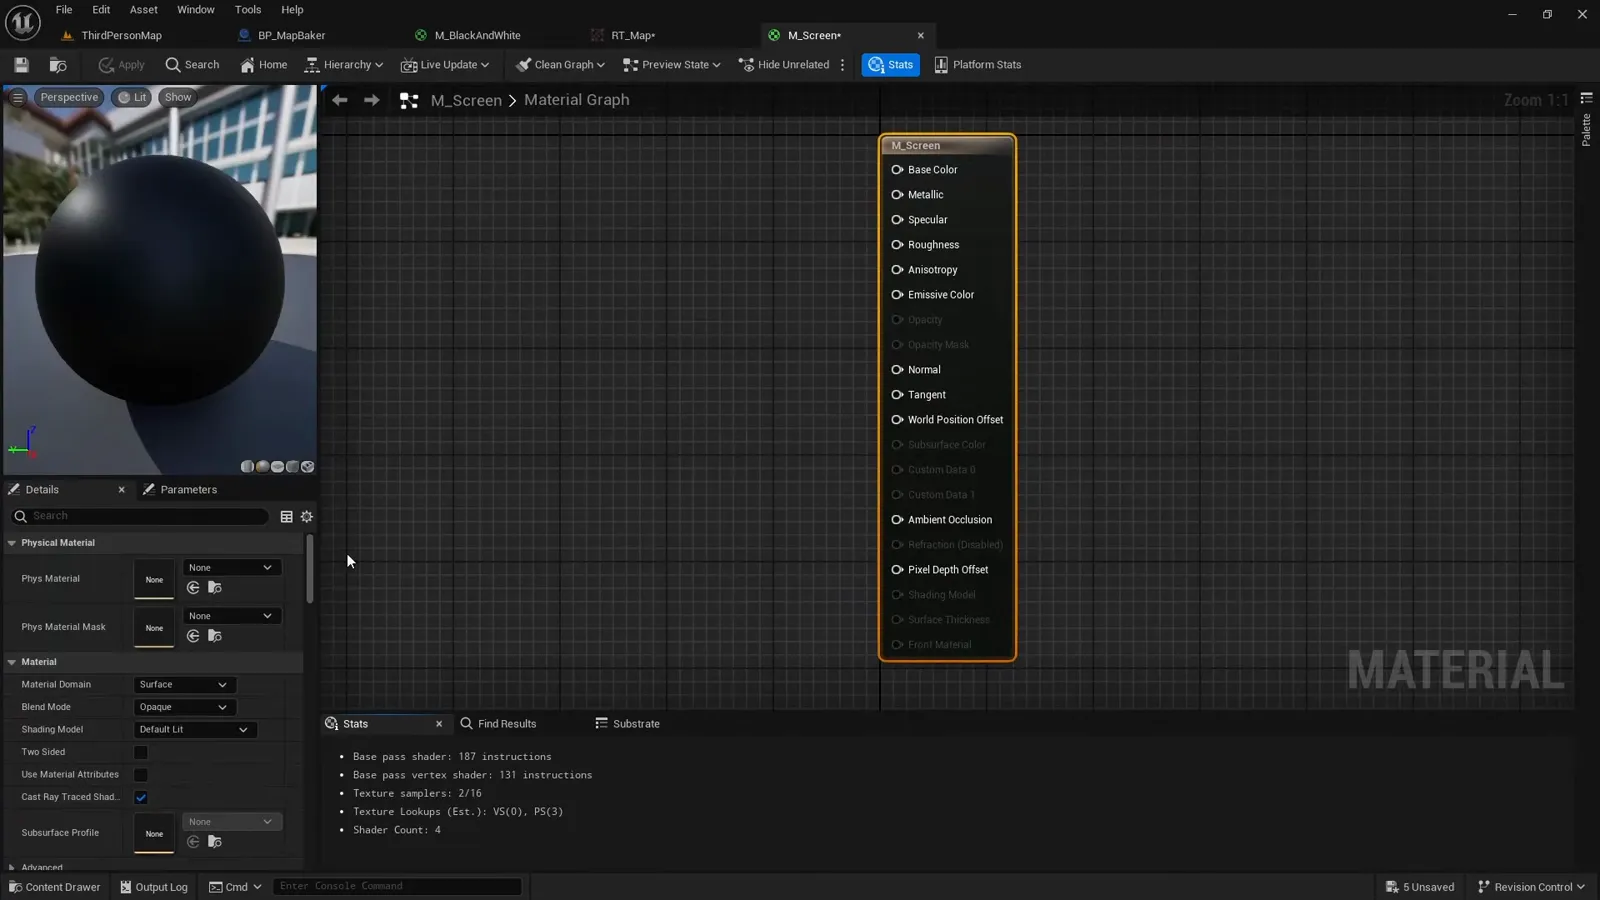
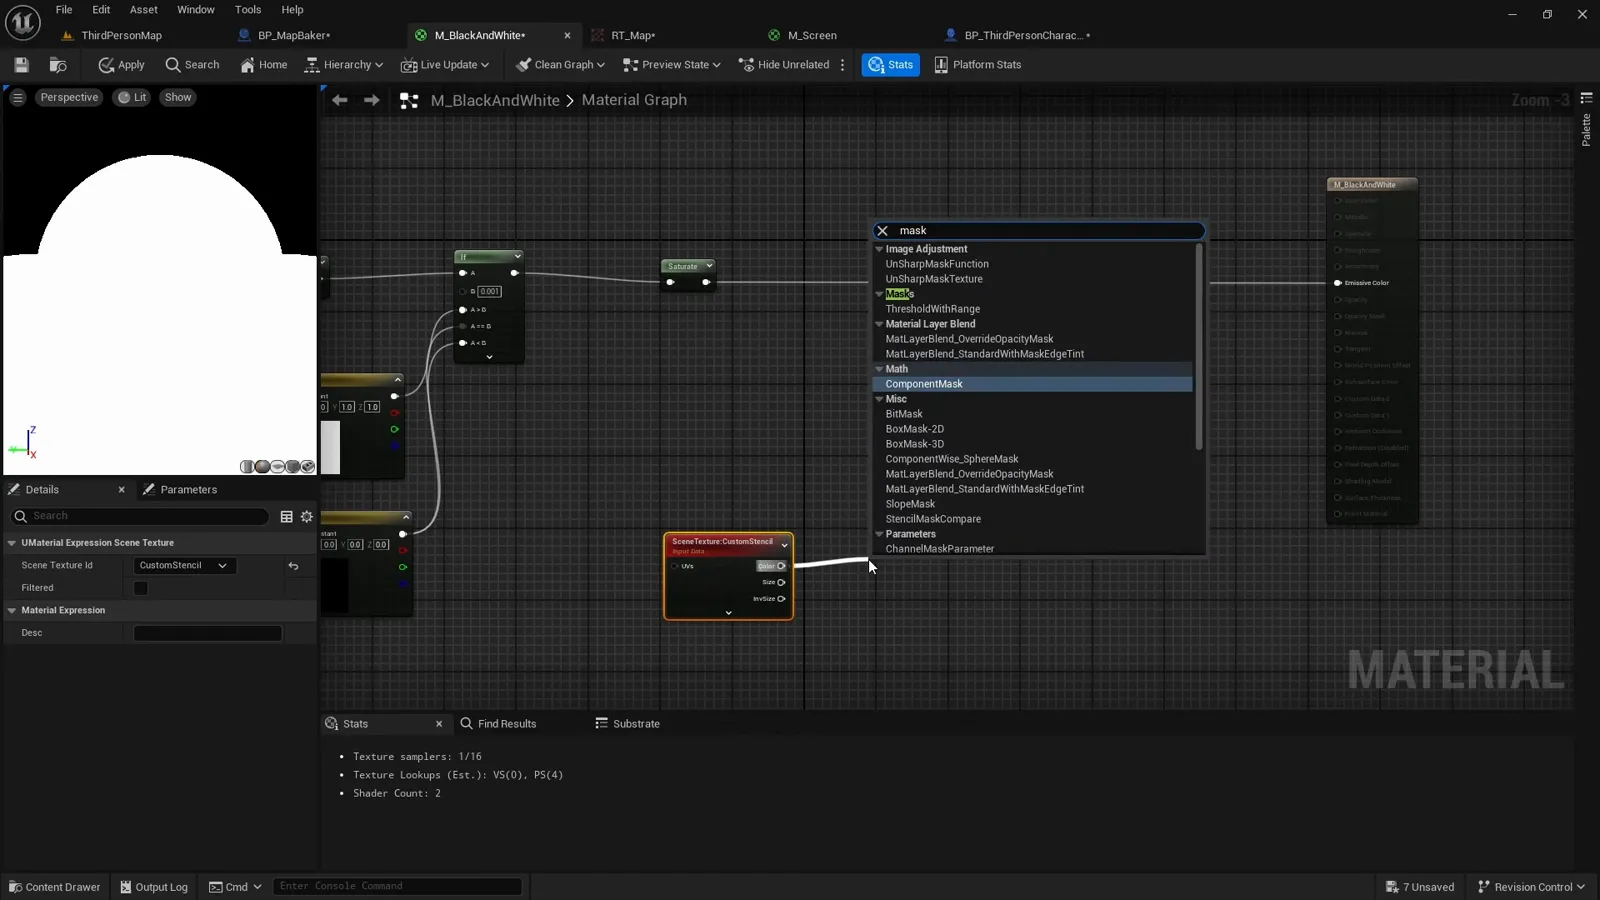
A black-and-white post-process material
To turn the capture into a mask we create a post-process material for the Scene Capture Component. The goal is simple: anything in the ShowOnly list returns white, everything else stays black. We use a Scene Texture node to read the diffuse color of each pixel, then an If node that says any pixel with at least some color returns white and everything else stays black. A Saturate node at the end keeps the values clamped between 0 and 1.
Previewing the result on a screen
To see what the capture produces, we display the render target on a big screen in front of us in the level. We make a very simple unlit material with a single Texture Sample node pointing at the render target, and apply it to the screen mesh.
Drawing the live player location
Now for the player marker. We add a mesh above the character in the shape we want to show on the map. Since we are feeling creative, we use a smaller robot.
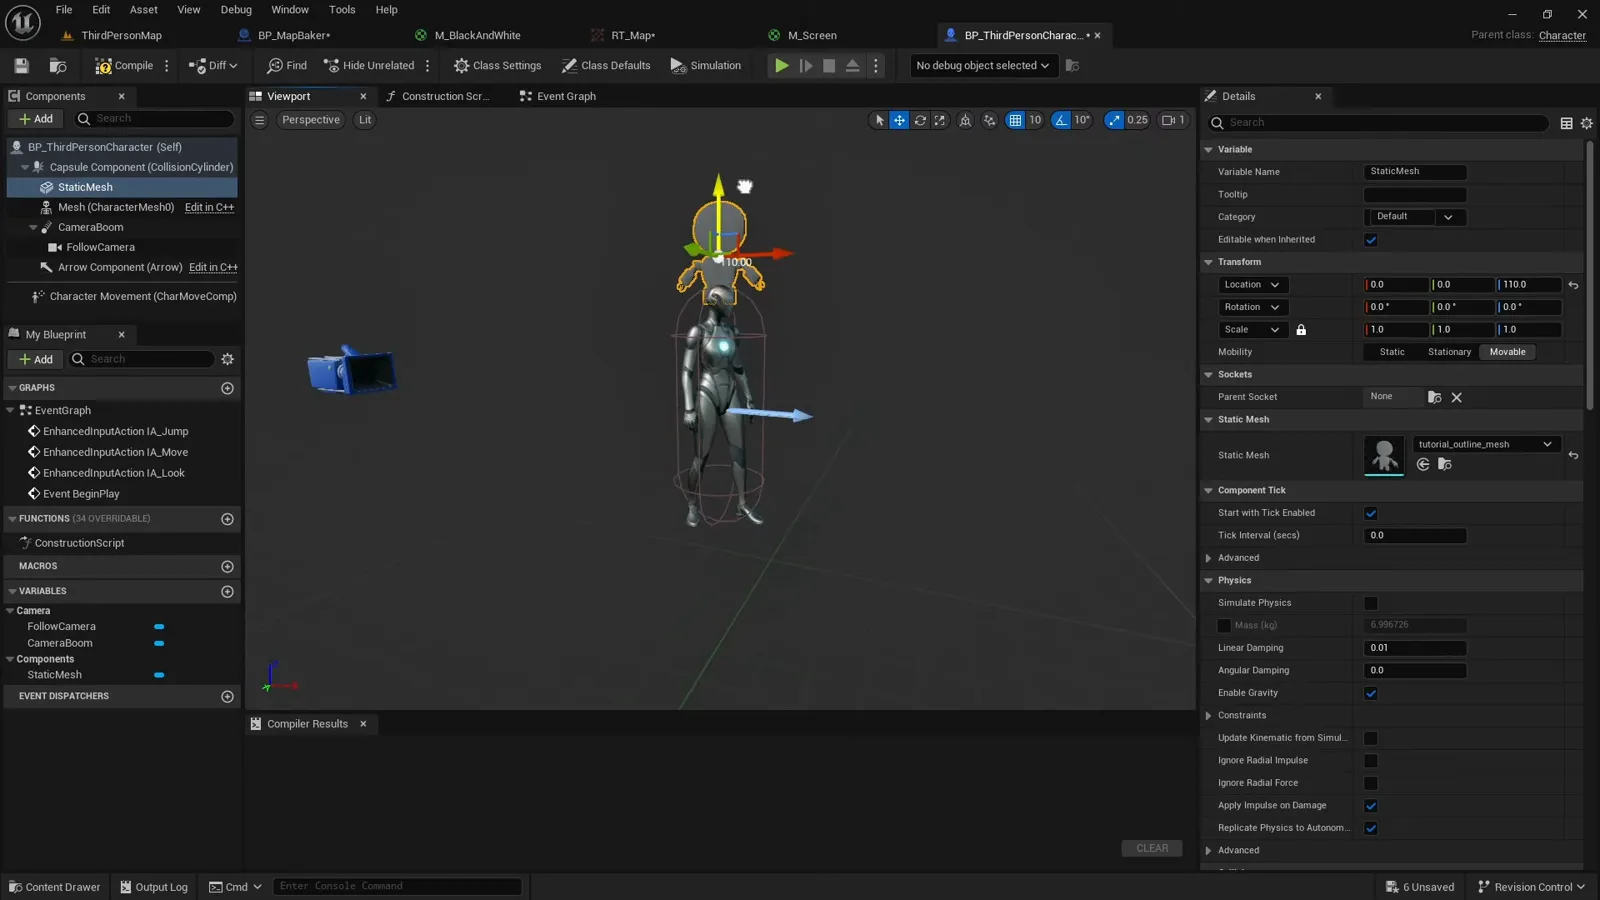
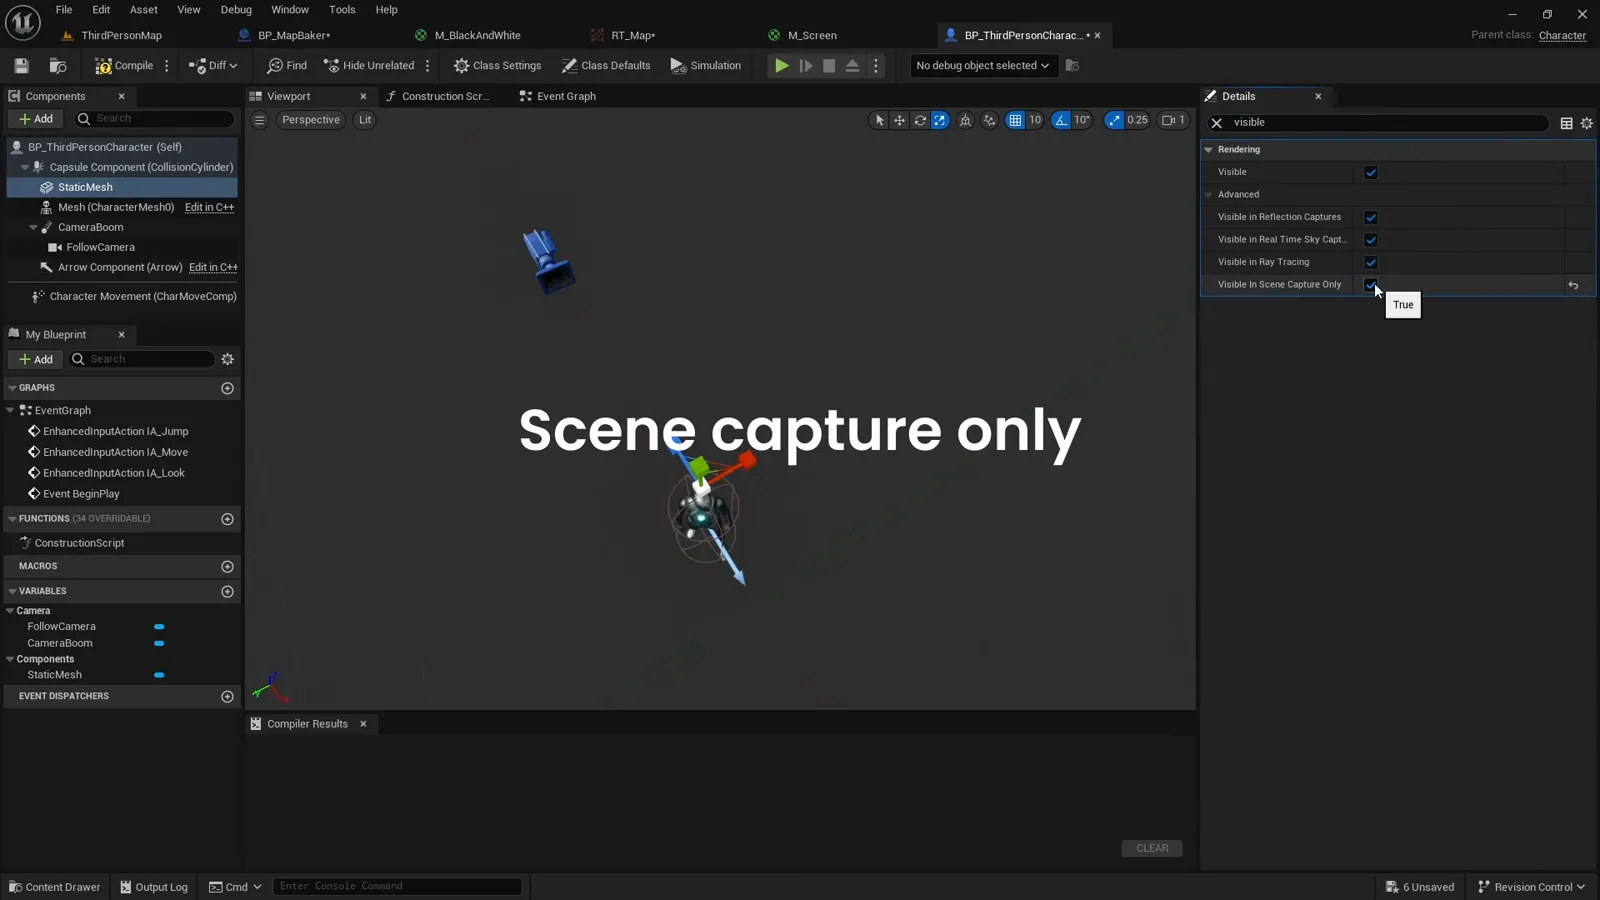
This marker should only appear on the map, not in the normal game view, so we enable Visible in Scene Capture Only on the mesh. The player never sees the floating robot, but the capture does.
Using a custom depth stencil to stamp the marker
Our goal is to draw the marker as a black shape on the white floor at the character’s location. We do this with a custom depth stencil. With the marker mesh selected, we open its Rendering properties, enable Render CustomDepth Pass, and set the Custom Depth Stencil Value to 1.
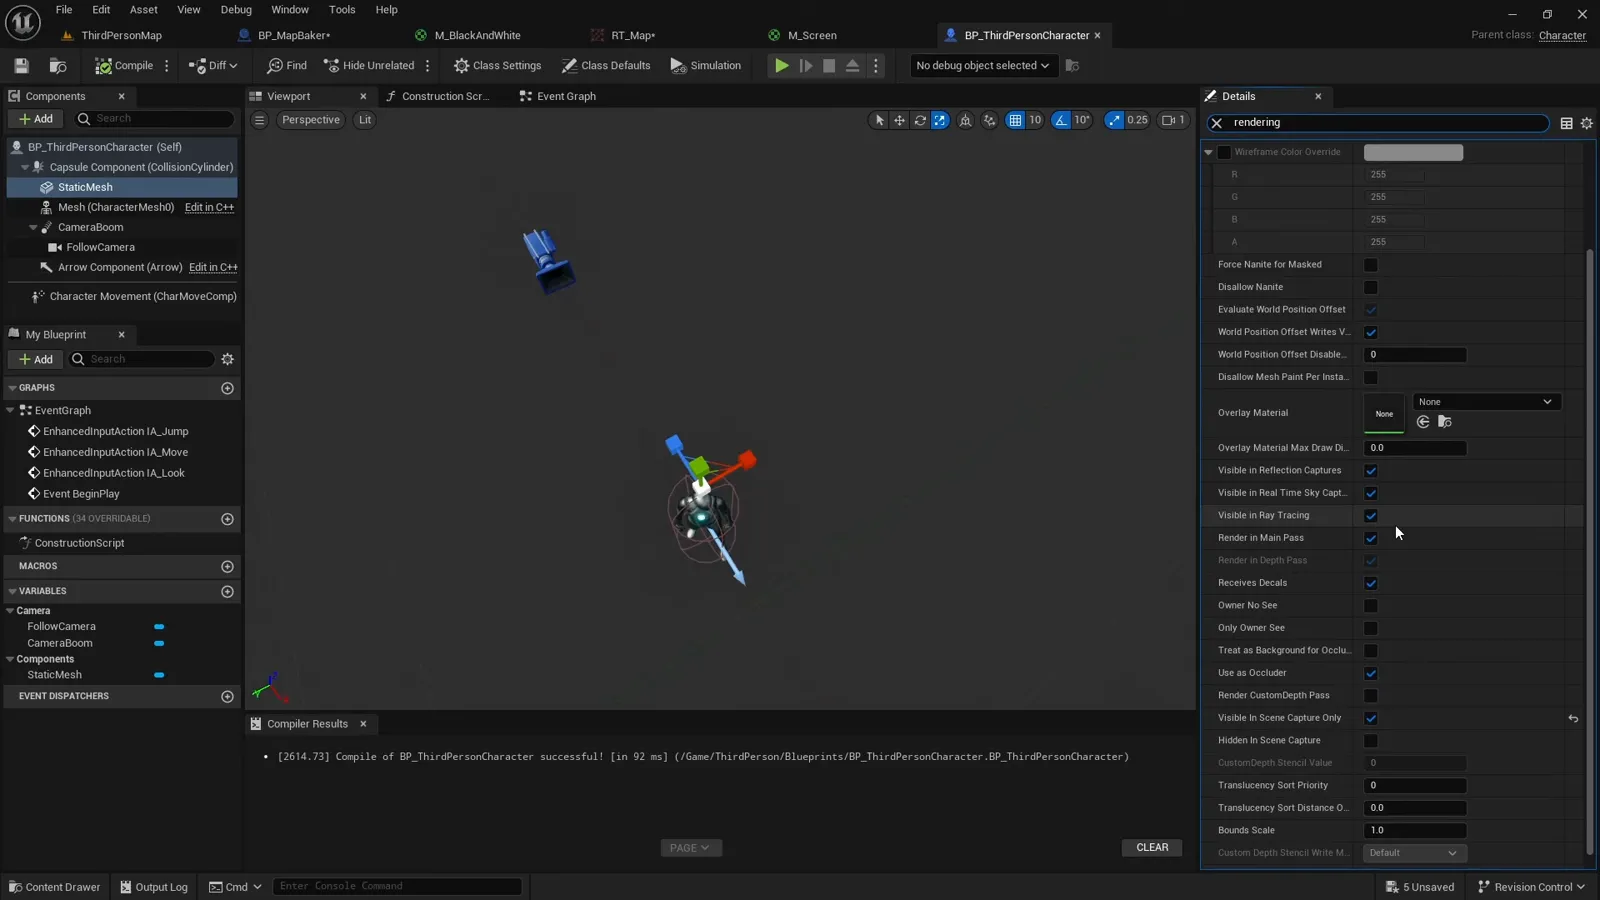
Back in the post-process material we use the stencil value to replace any pixel where it equals 1 with black. We read it with a Scene Texture node set to Custom Stencil; that gives a value on all channels, so we just pick red. A One Minus node flips it so stencil pixels become black, and a Min node between the white floor and the black marker leaves us with the marker shape cut into the white floor.
Adding the character to the show only list
The Scene Capture Component 2D only sees ShowOnly actors, so it cannot read the
stencil we just set unless the character (and its child marker mesh) is on that
list too. Otherwise the Custom Stencil Scene Texture node returns nothing. We use
the same scene capture tag trick to find the character and add it as a ShowOnly
actor alongside the floor.
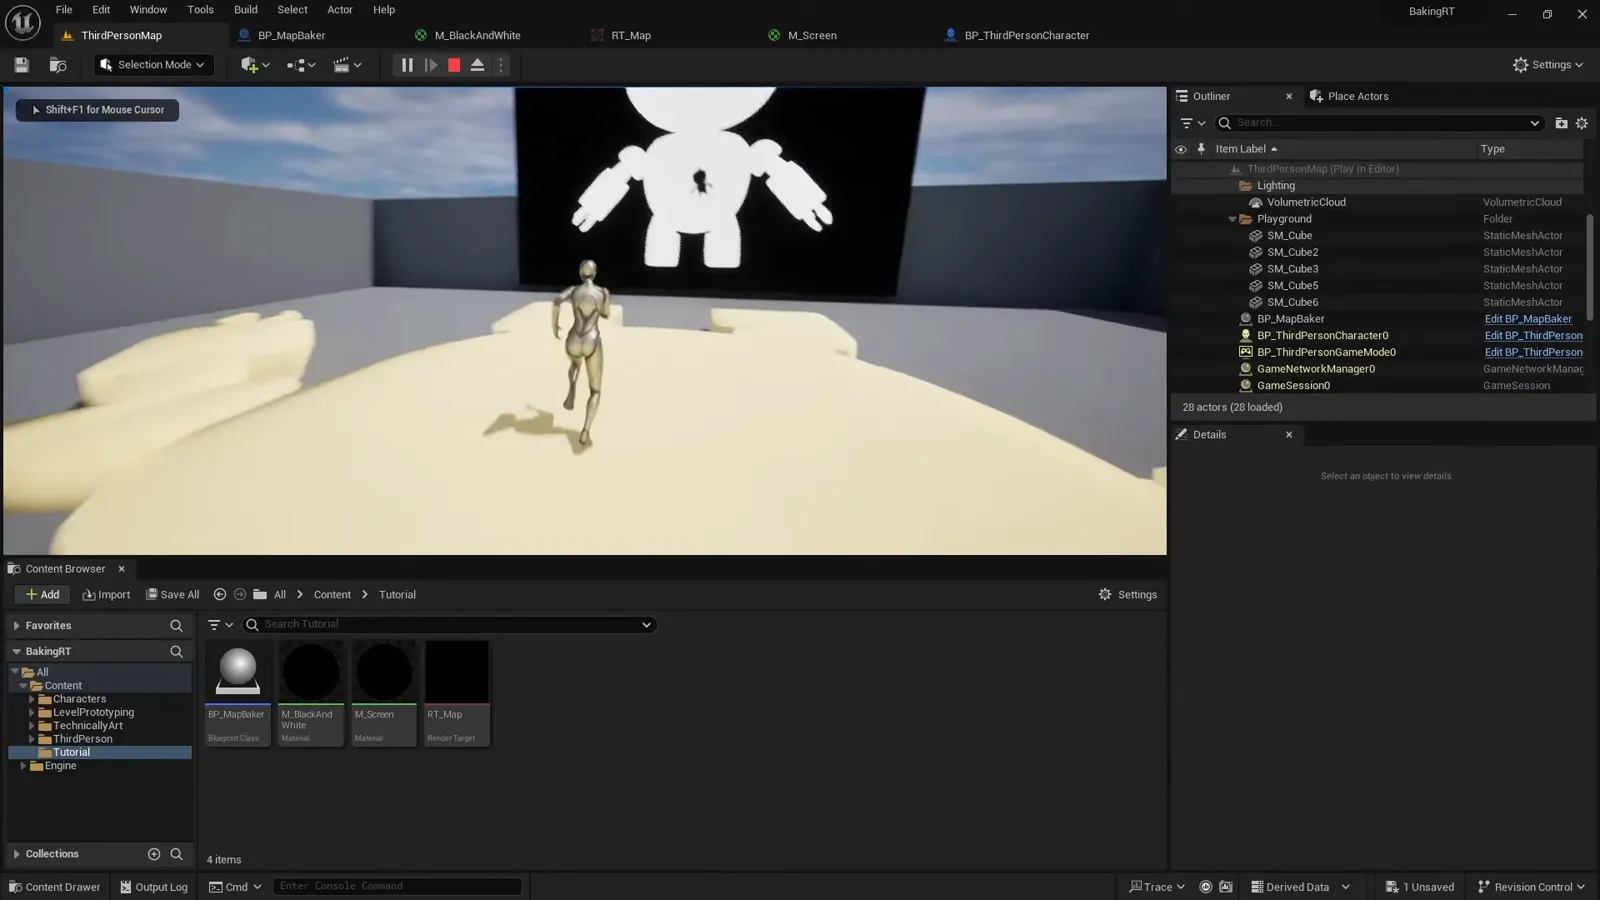
Seeing it in game
Starting the game, the render target now shows the player marker moving across the map in real time, captured live from above.
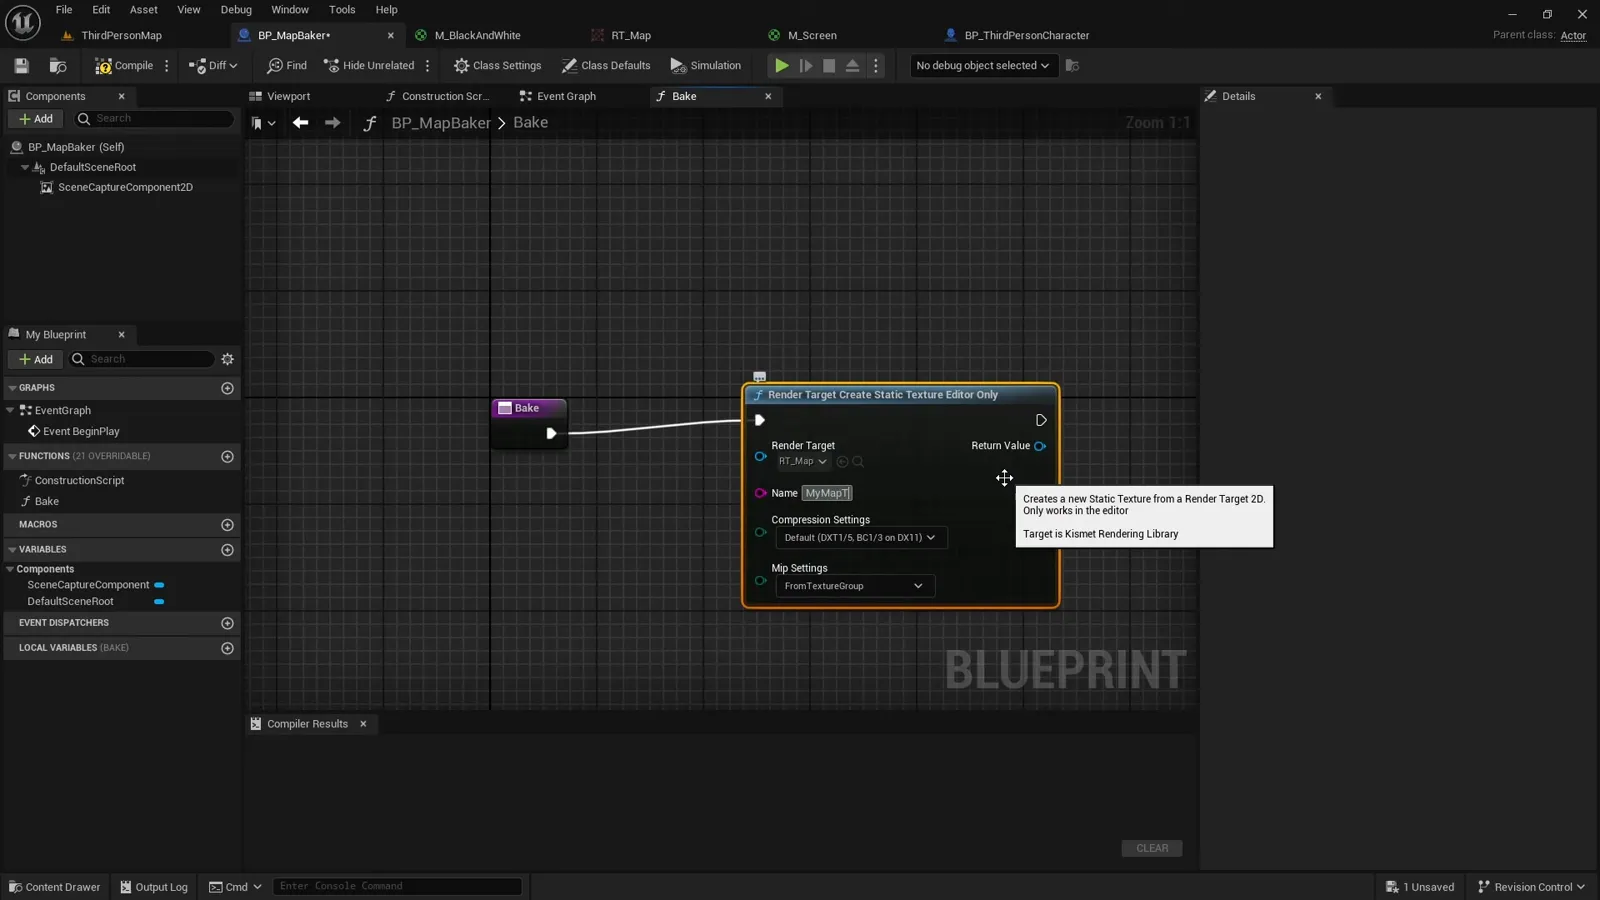
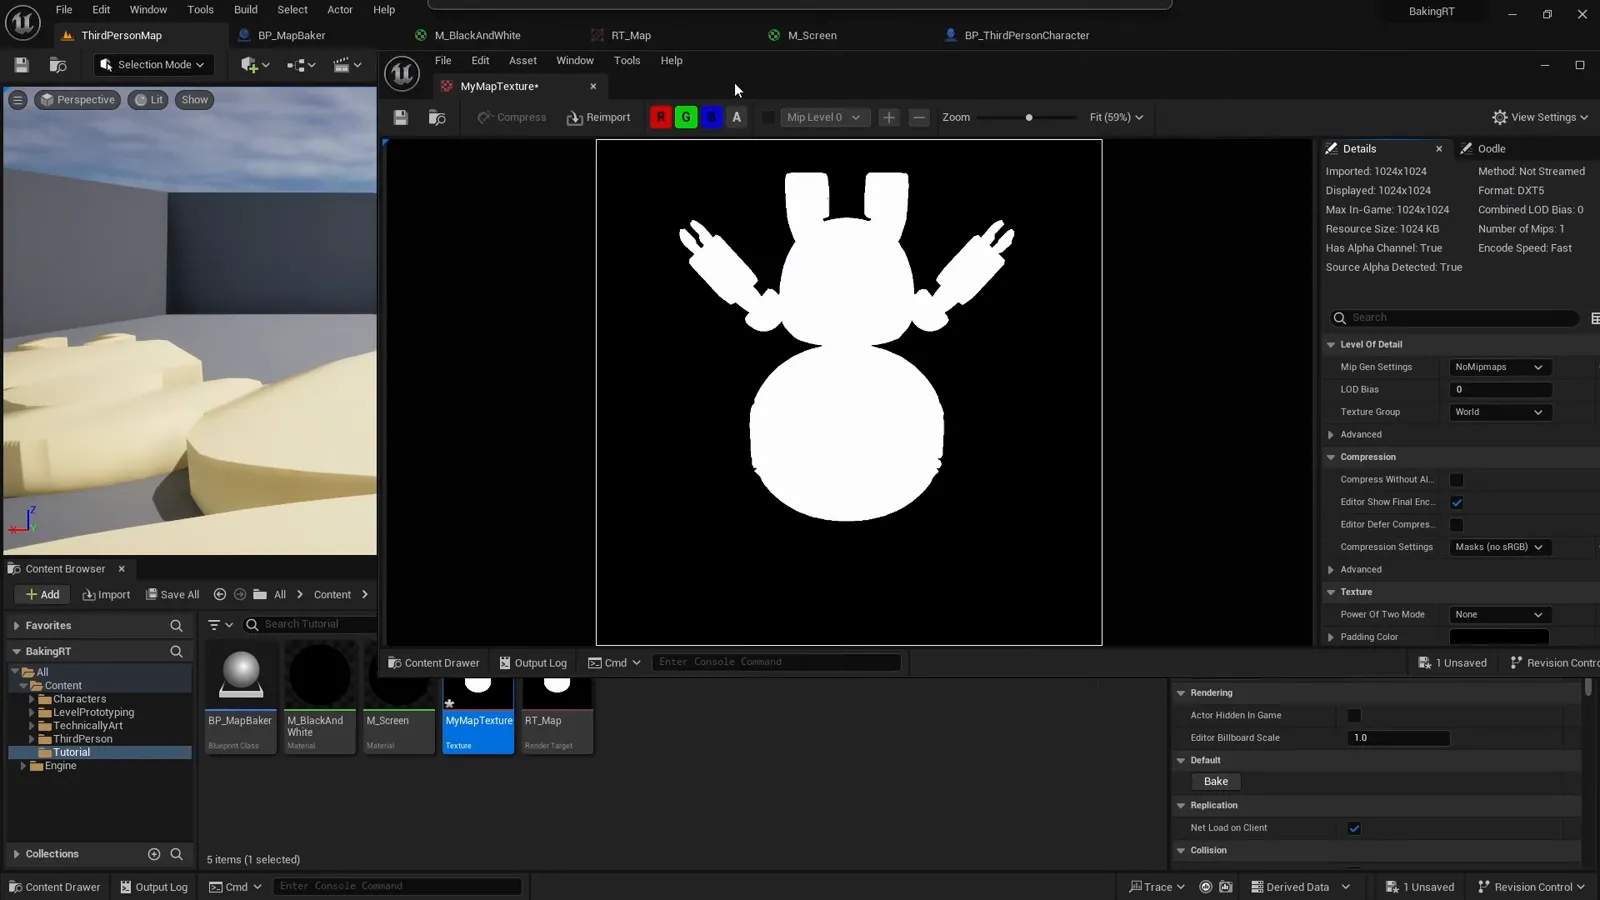
Baking the render target to a static texture
A live render target is great for a minimap, but for something like a static walkable mask we want to bake it out once. We add a Bake function to the map baker with a single node: Render Target Create Static Texture (Editor Only). We point it at our render target, set an export name, change the Compression Settings to Masks since this is a black-and-white mask, and say no to mipmaps.
Making bake work without running the game
That node can only run from the editor, so we mark the Bake function as Call In Editor. But because we are now baking without pressing Play, BeginPlay never fires, which means the ShowOnly list never gets populated. We move that setup into the Construction Script so the capture is configured whether or not the game is running.
Flipping the upside-down bake
Calling Bake now exports the current render target as a new static texture. Like most newborns, it arrives upside down. To fix it we rotate the Scene Capture Component by 180 degrees and bake again, and the texture comes out the right way up.
Wrapping up
That is the full pipeline: a Scene Capture 2D pointed at the floor, a render target to capture into, a black-and-white post-process material, a custom depth stencil to stamp the live player marker, and an editor bake to freeze it all into a static texture. The same approach drives minimaps, location indicators, and the walkable floor masks used in fog of war.
If you want a replicated, performance-minded fog of war system built on top of techniques like this, the Multiplayer Fog of War plugin packages it up for multiplayer and single-player top-down games.