How to Make Meshes Pop in Unreal Engine: Pop-In, Squash & Stretch, Wobble
Four ways to make meshes pop in Unreal Engine, compared honestly: a Timeline scale curve, material World Position Offset, Sequencer, and ready-made presets, covering spawn pop-ins, squash and stretch, wobble, and build reveals.
A mesh that simply appears feels dead. The same mesh that springs up from nothing, overshoots its size, and settles with a tiny squash feels alive, and players read that as quality. This is the heart of “game juice”: short, snappy, secondary motion layered on top of things that would otherwise just sit there.
This guide covers the practical ways to get that pop in Unreal Engine, what each one costs you, and when to reach for which. Three of them are built into the engine and free. The fourth is a plugin I make, Spline Juice, and I will be upfront about where it fits and where the built-in tools are the better call.
What “pop” usually means
When people ask how to make meshes pop, they tend to mean one of three things:
- Pop-in on spawn. A pickup, a loot drop, a placed building, or a UI-style 3D element appears with an overshoot and a settle instead of blinking into existence.
- Life in a static scene. Props and scenery that never move get a little secondary motion: a breathing pulse, a jelly wobble, a machine whirring in place.
- A build or reveal moment. A mesh assembles itself from pieces, grows out of the ground, or melts away.
All three are the same underlying idea: animate the mesh’s shape or scale over a fraction of a second with an overshoot curve. The question is where that animation lives: on the actor’s transform, in the material, or in a tool that manages it for you.
Method 1: Timeline + scale curve
The quickest pop-in, and the one to reach for when you need it on exactly one actor.
- Open the actor’s Blueprint and add a Timeline node, driven from Event BeginPlay into Play from Start.
- Inside the Timeline, add a float track named
Scale, set the length to0.35, and add four keys:(0.00, 0.01),(0.20, 1.20),(0.28, 0.92),(0.35, 1.00). Right-click the keys and set them to Auto so the curve eases through the overshoot. - From the Timeline’s Update pin, call Set Actor Scale 3D (or
Set Relative Scale 3D on the mesh component) and feed it a Make Vector
with
Scalein X, Y, and Z.
Start at 0.01 rather than 0: a zero scale can trip collision warnings. For a
squash on landing, add a second track and drive Z with it while X and Y get
1 / sqrt(Squash), which keeps the volume roughly constant so the mesh reads as
squashing rather than shrinking.
The trade-offs. This scales the real transform. Collision, overlap events, and anything attached to the actor scale right along with it, so a pickup that pops in can briefly overlap the player at 1.2x size. It can only scale: the mesh cannot bend, bulge in one spot, wobble tip-first, or melt. And it lives in each actor’s Blueprint, so fifty different props mean fifty copies of the logic (or a shared component you now maintain).
Method 2: Material World Position Offset
World Position Offset (WPO) moves vertices in the material at render time only. The actor, its transform, and its collision never move, which is exactly what you want for a purely cosmetic flourish.
A pop-in in the material. Subtract Object Position from
Absolute World Position to get each vertex relative to the pivot (call it
Rel). Multiply Rel by (PopScale - 1) and plug the result into
World Position Offset. At PopScale = 0 the mesh collapses to its pivot; at
1 it is untouched. Drive PopScale from Blueprint by creating a
Dynamic Material Instance on BeginPlay and calling
Set Scalar Parameter Value from the same Timeline curve as Method 1.
A wobble for idle life. A Custom node gives you a sway that moves the top more than the base:
// Inputs: Rel (float3: Absolute World Position - Object Position),
//         Time, Amp, Freq, Height
float h = saturate(Rel.z / Height);          // 0 at the pivot, 1 at the top
float sway = sin(Time * Freq) * Amp * h * h; // tip moves more than the base
return float3(sway, 0, 0);                   // sway along world X
Do the subtraction with regular nodes before the Custom node, so the HLSL only sees a small float3 instead of large world coordinates. Add the output to anything else already feeding World Position Offset.
The trade-offs. You edit every material the effect should run on (a Material Function helps, but it still has to be wired into each master material). WPO that pushes vertices outside the mesh’s bounds gets culled, so you raise the component’s Bounds Scale to compensate. A parameter you set from Blueprint does not produce motion vectors on its own, so under TAA or TSR the mesh smears and ghosts until you add a previous-frame evaluation through a PreviousFrameSwitch. And on an animated skeletal mesh the pivot-relative math runs on already-skinned vertices, so height- or pivot-based effects drift with the pose.
If you want to go deep on this route, I wrote a full build-along for squash and stretch along a spline with World Position Offset, including the motion-vector fix.
Method 3: Sequencer
For a one-off hero moment, such as a cinematic reveal or a trailer shot, a Level Sequence is the most art-directable option. Key the actor’s scale, or key a material parameter track that drives a WPO effect from Method 2, and scrub it frame by frame with the curve editor.
The trade-offs. It is keyframed per shot, so it does not scale to dozens of props or to things that spawn at runtime. Transform keys have the same collision behavior as Method 1. A build or assemble reveal done this way usually means hand-animating pieces, or reaching for a Chaos Geometry Collection, both of which are heavy for a moment that is purely cosmetic.
Method 4: Ready-made presets with Spline Juice
Full disclosure: Spline Juice is my plugin. It exists because I kept rebuilding Method 2 for every project. It packages the WPO approach (collision never moves, motion vectors handled, bounds expanded while it plays) behind an editor panel, and ships the common motions as presets. It works on any static mesh and on animated skeletal meshes, needs no material editing and no C++, and supports Unreal Engine 5.1 to 5.8.
Getting a pop-in on a mesh:
- Right-click the mesh actor in the level viewport and choose Spline Juice > Add Deform Component. It works on a whole selection at once.
- On the Meshes & Materials tab, click Generate Deform Materials. It authors a deform-capable copy of each material and leaves your originals untouched, so you never open the material editor.
- On the Presets tab, pick Pop In (Spawn) and click Apply.
- Switch on Live Preview to see it in the viewport without pressing Play. In game it runs on Auto Play, or you trigger it from Blueprint.
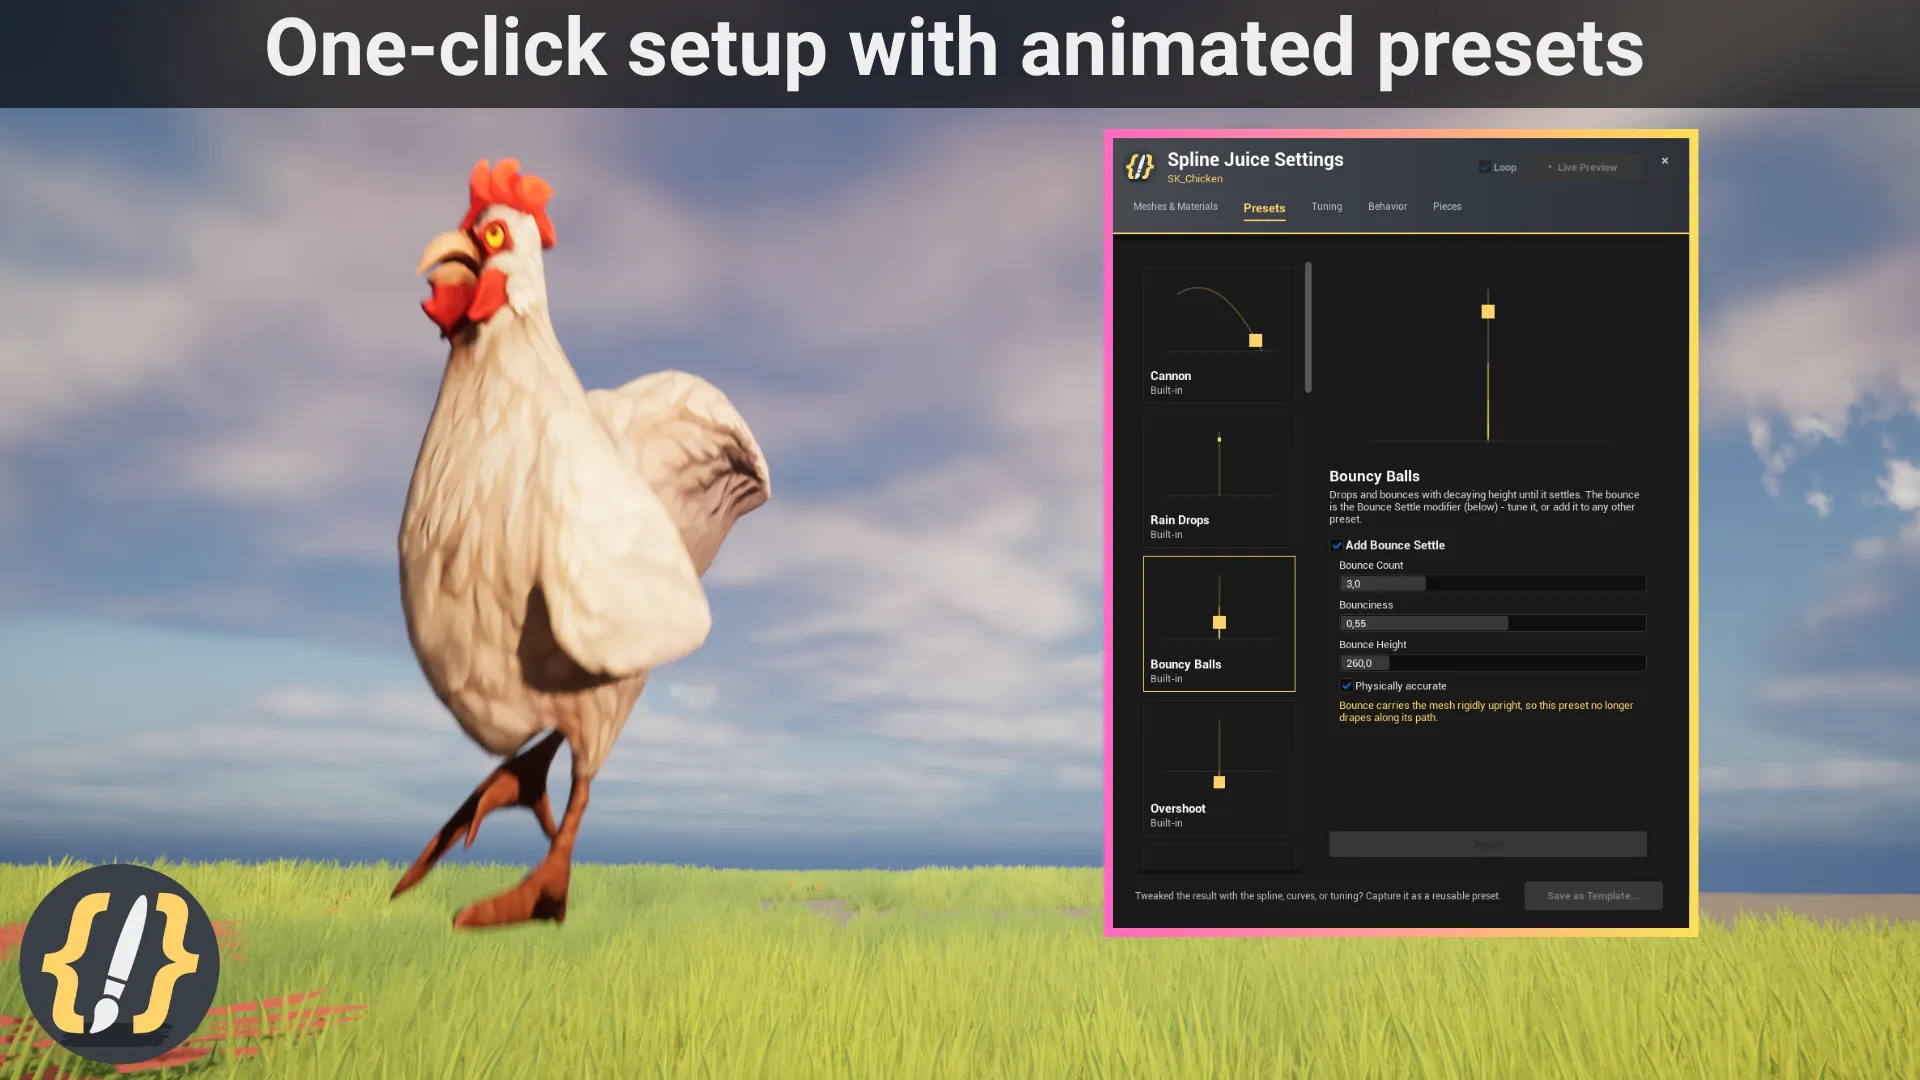
The presets map onto the three kinds of pop from the top of this guide:
- Pop-in and spawn: Pop In, Grow From Ground, Rain Drops, Overshoot, and a Bounce Settle modifier you can add to any preset.
- Life in a static scene: Idle Breathe, Wobble (Jello), Balloon Up, Gulp, Rumble, and Whirring.
- Build and reveal: Cannon Burst (the mesh shatters into pieces, tumbles, and reassembles as it lands) and Goo Drip (a slow melt into a puddle), plus Squash & Stretch, Bouncy Balls, Cannon, and Follow Path for motion and impact.
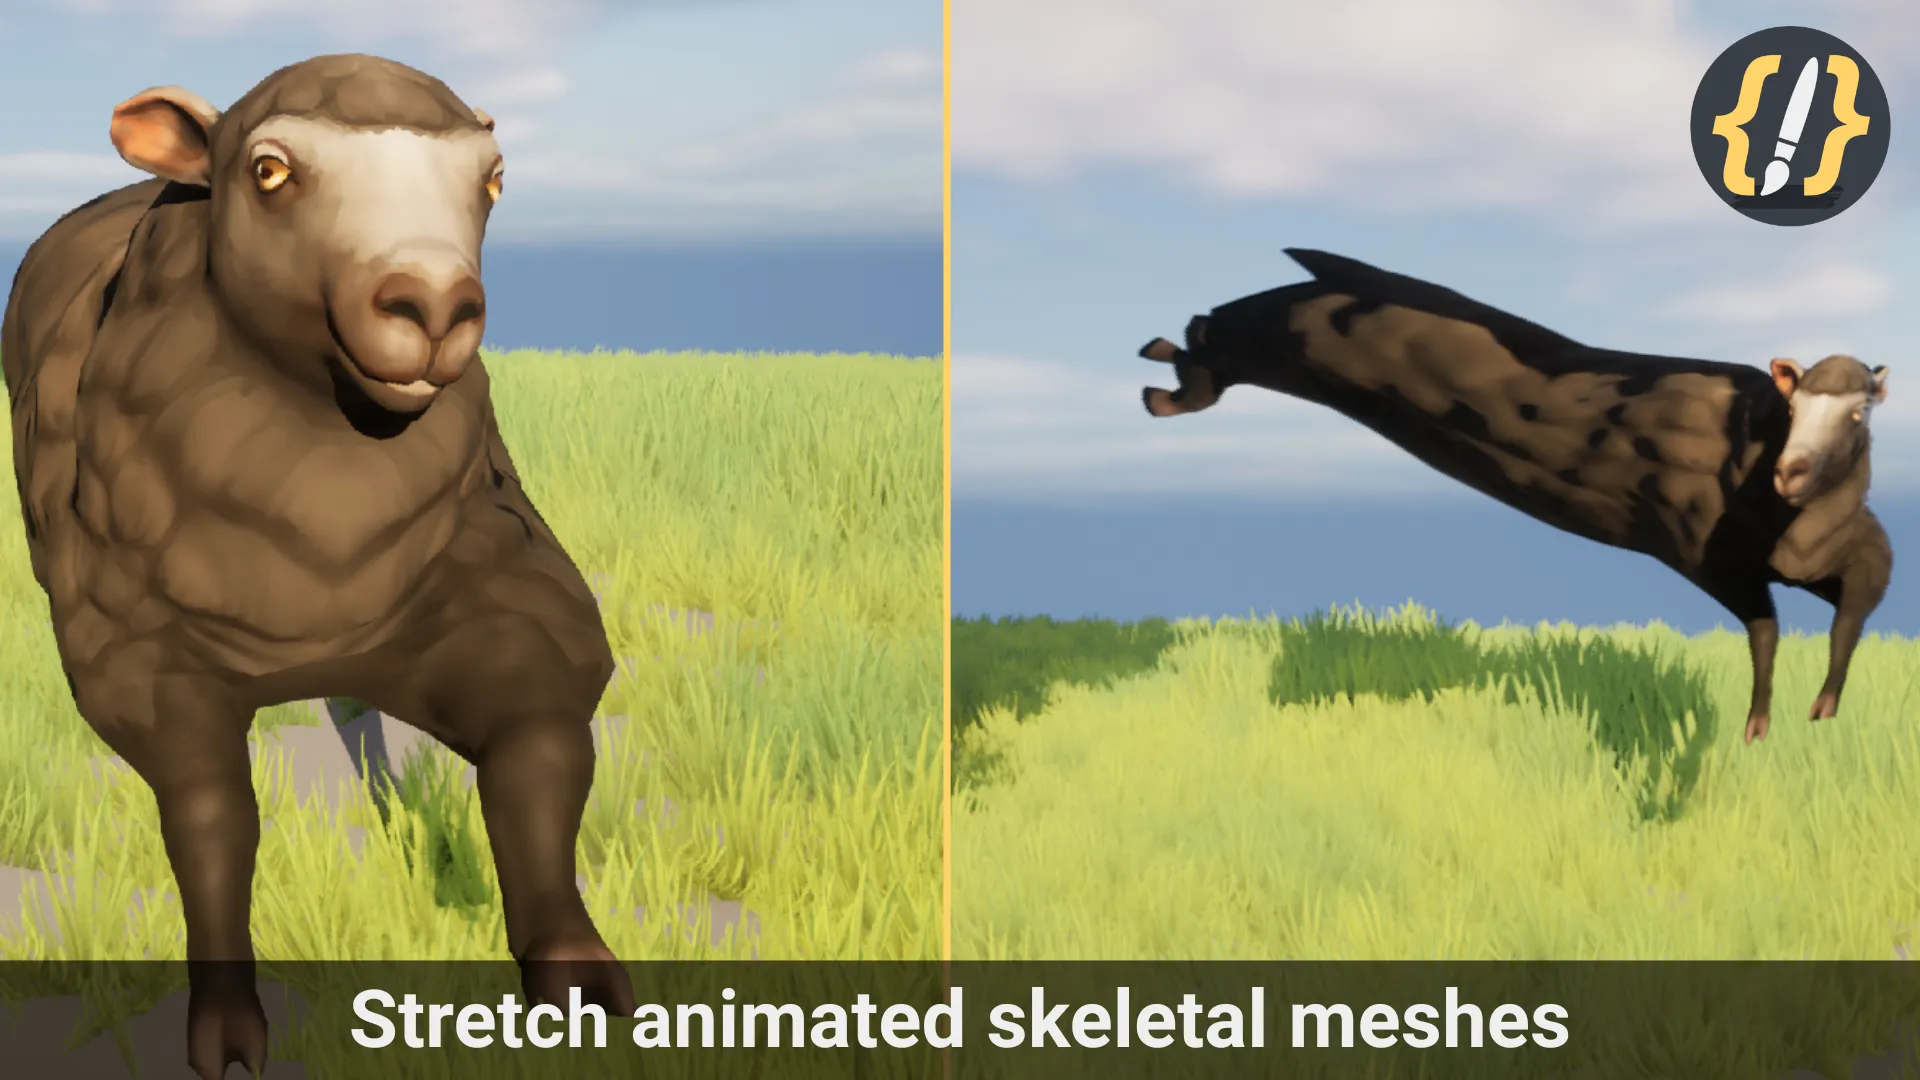
Because the deform layers on top of the playing animation, it works on characters too, not just props:
And for build moments, a static mesh can explode into pieces and settle back together as it travels:
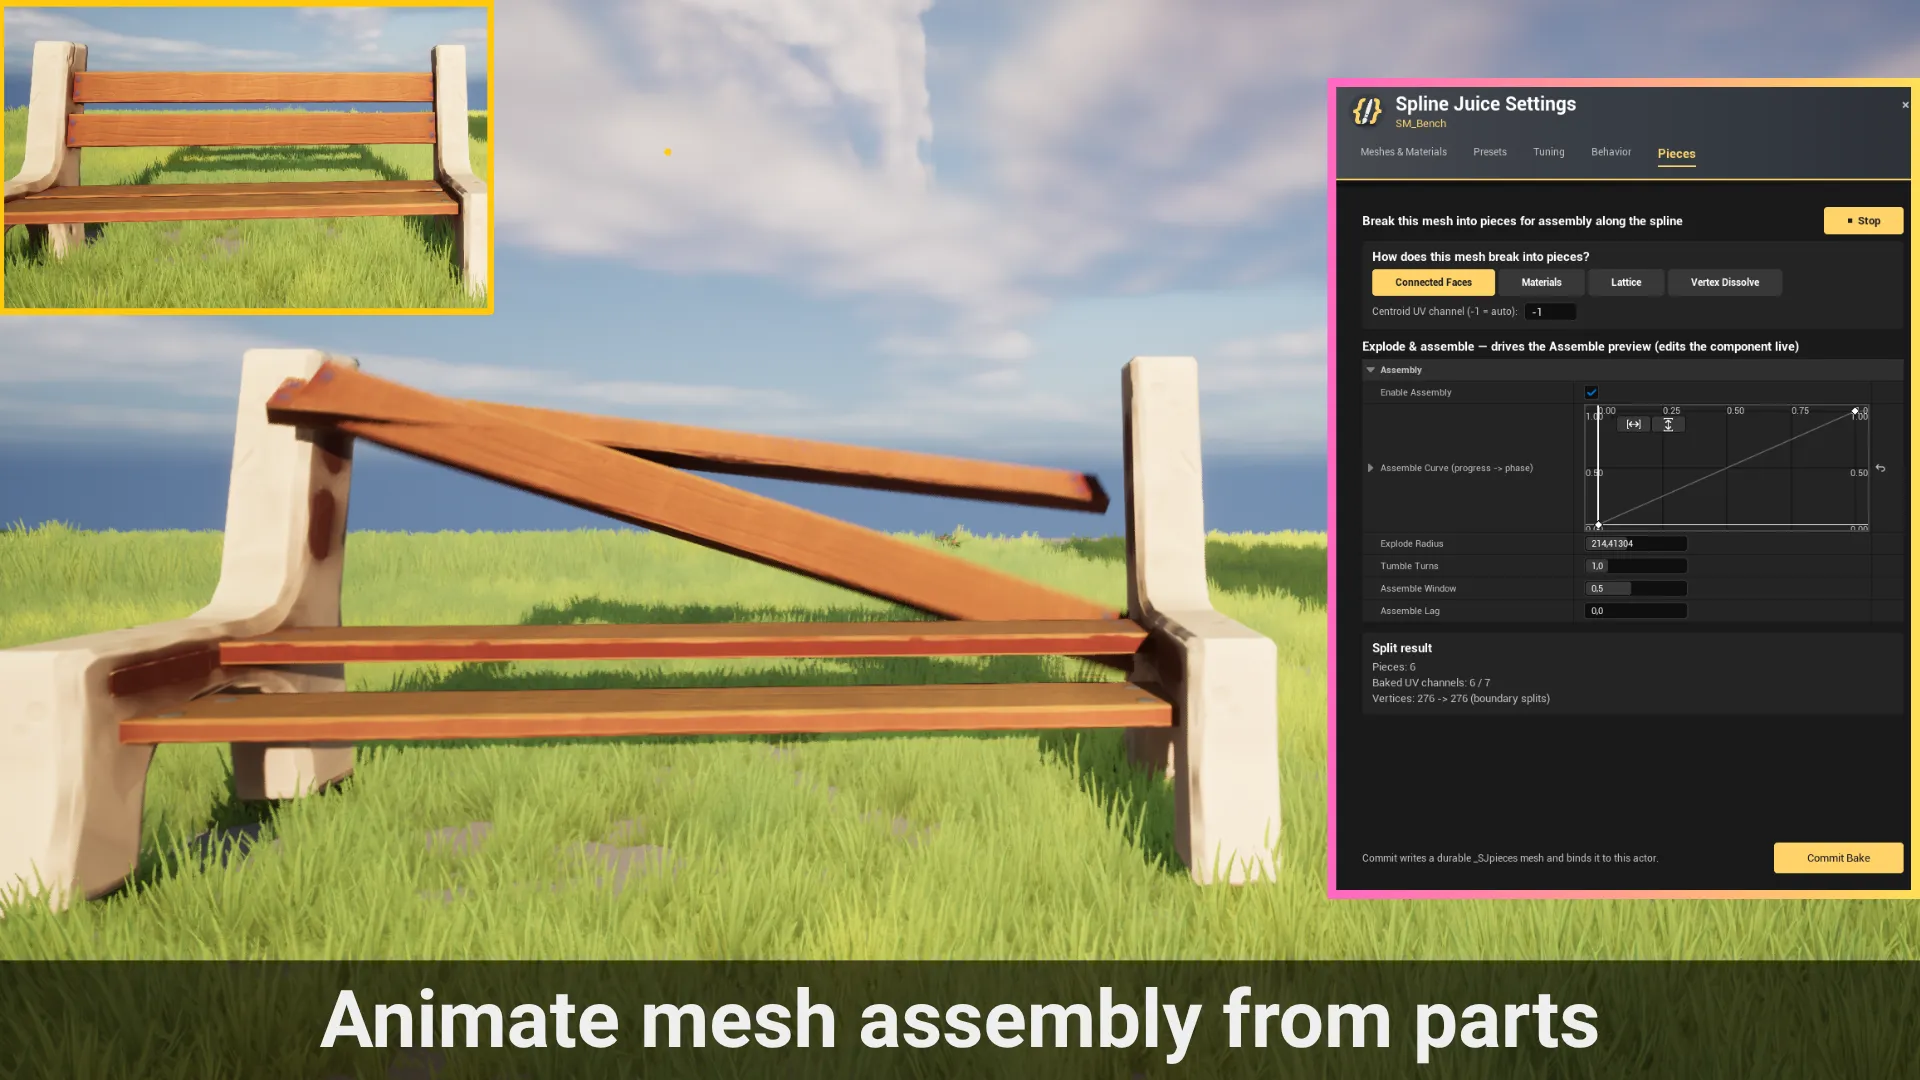
Every preset stays editable after you apply it (the spline, the timing, and the squash, wobble, inflate, melt, and bulge curves), and Group Stagger plays a whole selection as one wave instead of all at once. The Presets documentation describes each one.
The trade-offs. It is a paid plugin on FAB, where the built-in methods are free. It deforms shape and scale; it does not do outlines, glows, or hover highlights. It is visual only, so if you want collision to grow with the mesh, Method 1 is the right tool. And the assembly effect is static-mesh only.
Side by side
| Timeline scale | Material WPO | Sequencer | Spline Juice presets | |
|---|---|---|---|---|
| Collision stays put | No | Yes | No (transform keys) | Yes |
| Bends, squashes, wobbles the shape | Scale only | Yes, hand-written | Scale, or via material params | Yes, 16 presets |
| No material editing | Yes | No, every material | Yes (transform keys) | Yes, generated for you |
| Animated skeletal meshes | Uniform scale only | Tricky | Uniform scale only | Yes |
| Reuse across many actors | Per Blueprint | Per material | Per shot | Per selection, as a wave |
| Setup time | Minutes | An hour or more | Minutes per shot | Seconds |
| Cost | Free, built in | Free, built in | Free, built in | Paid (FAB) |
Which should you use?
- One actor, simple uniform pop, and collision growing is fine: the Timeline. It is five minutes of work and nothing to install.
- A specific shader effect on a handful of materials, and you want full control of the math: hand-written WPO. Budget time for bounds and motion vectors.
- A single cinematic moment: Sequencer.
- Lots of props, animated characters, several kinds of motion, or no appetite for material work: Spline Juice gets you there in seconds per mesh.
Whichever you pick, the rule that makes it read as “juice” is the same: overshoot, then settle. A pop that lands exactly on its final size looks mechanical; one that goes about 20 percent past and eases back looks alive.
Frequently asked questions
- What is the easiest way to make a mesh pop in when it spawns in Unreal Engine?
- For a single actor, a Timeline that drives Set Actor Scale 3D through an overshoot curve (from near zero up to about 1.2, then settling at 1) takes a few minutes. For many props, animated skeletal meshes, or effects that bend and squash the shape, a preset tool such as Spline Juice applies a Pop In effect in a few seconds without touching materials.
- Does scaling the actor also scale its collision?
- Yes. Set Actor Scale 3D, Set Relative Scale 3D, and Sequencer transform keys all change the real transform, so collision, overlaps, and attached components scale with the mesh. World Position Offset only moves the rendered vertices, so collision stays exactly where it was.
- Why does my World Position Offset animation ghost or smear?
- Temporal anti-aliasing (TAA or TSR) needs motion vectors, and a WPO offset driven by a parameter you set from Blueprint does not produce them on its own. Evaluate the offset a second time with last frame's values and route both through a PreviousFrameSwitch node so the velocity pass sees the motion.
- How do I make a static scene feel alive in Unreal Engine?
- Add slow, looping secondary motion to props that would otherwise sit still: a breathing pulse, a gentle wobble, a mechanical whir. A time-driven sine in material World Position Offset does this cheaply per material, and Spline Juice ships Idle Breathe, Wobble, Whirring, and Rumble presets that apply to any mesh without material editing.
- Can I squash and stretch an animated skeletal mesh?
- Scaling the actor works but squashes the whole character uniformly. Hand-written WPO runs on already-skinned vertices, so pivot-based math drifts with the pose. Spline Juice builds a dedicated skeletal variant of each material, so squash, stretch, and wobble layer cleanly on top of the playing animation.