Top-Down Fog of War in Unreal Engine, Part 1: The Post-Process Setup
Part 1 of building top-down fog of war in Unreal Engine: a Fog Manager actor that feeds a post-process material, plus the floor mask and player spotlight.

This is the first part of a tutorial series on building top-down fog of war in Unreal Engine. In this video I go over how I set up a simple actor that creates a fog of war post-process volume and sends data from the world into a post-process material.
I consider this an intermediate guide. You should be comfortable with simple C++ and common pieces like the post-process volume and render targets. By the end you will be able to set up your own fog of war post-process volume with a spotlight around the player, exactly as shown in the video above.
The Fog Manager actor
The main actor responsible for setting up the post-process volume is called
BPFogManager. We open its blueprint and go straight to its C++ parent, which is
where the real work happens. This class sets up the global post-process volume and
applies the fog material to it.
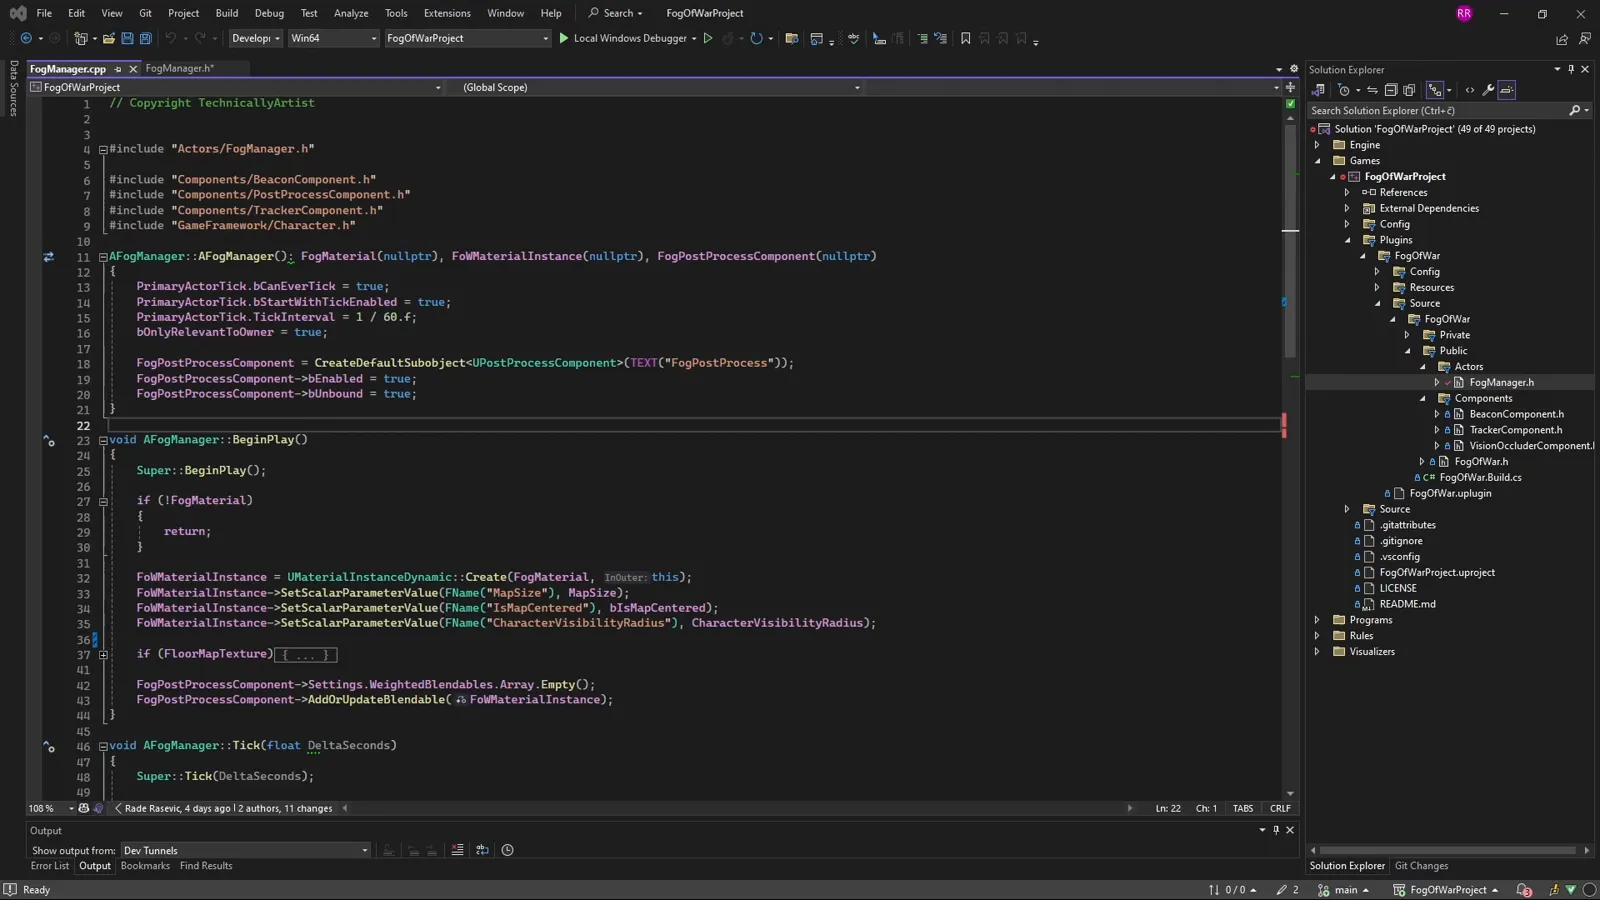
Constructor: an unbound post-process volume
In the constructor we create the post-process volume component and set its
bUnbound flag to true, so that the volume encompasses the entire world rather
than just the area inside its bounds. That single setting is what lets the fog
cover the whole map.
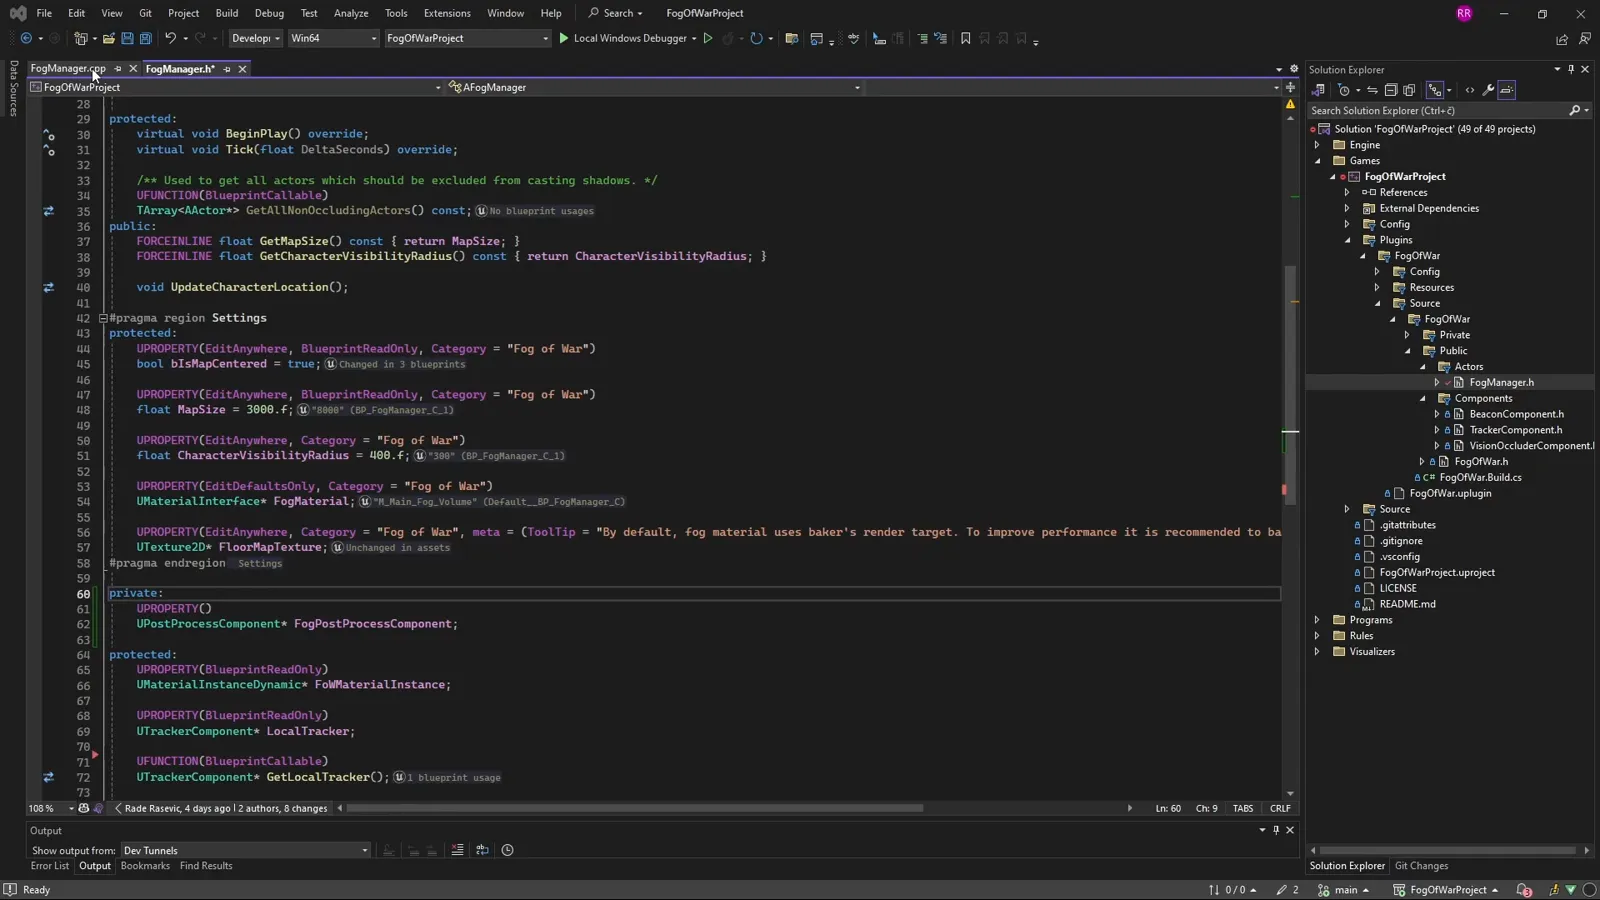
BeginPlay: a dynamic material instance
In BeginPlay we create a dynamic instance of the fog material so that we can
pass live world values to it at runtime, then apply that instance to the
post-process volume.
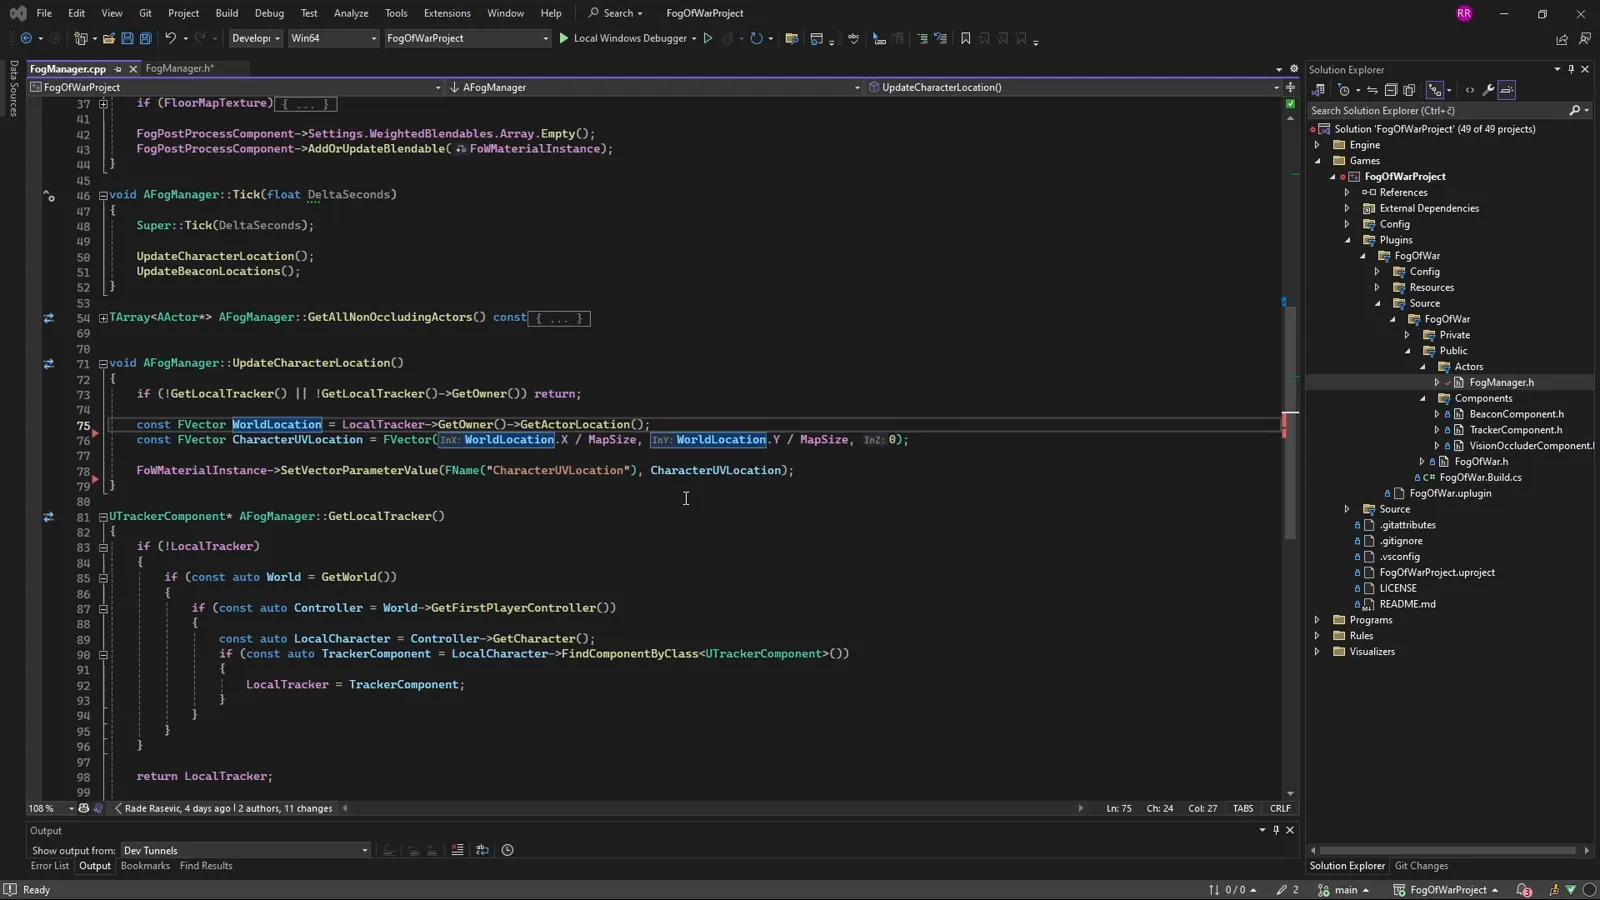
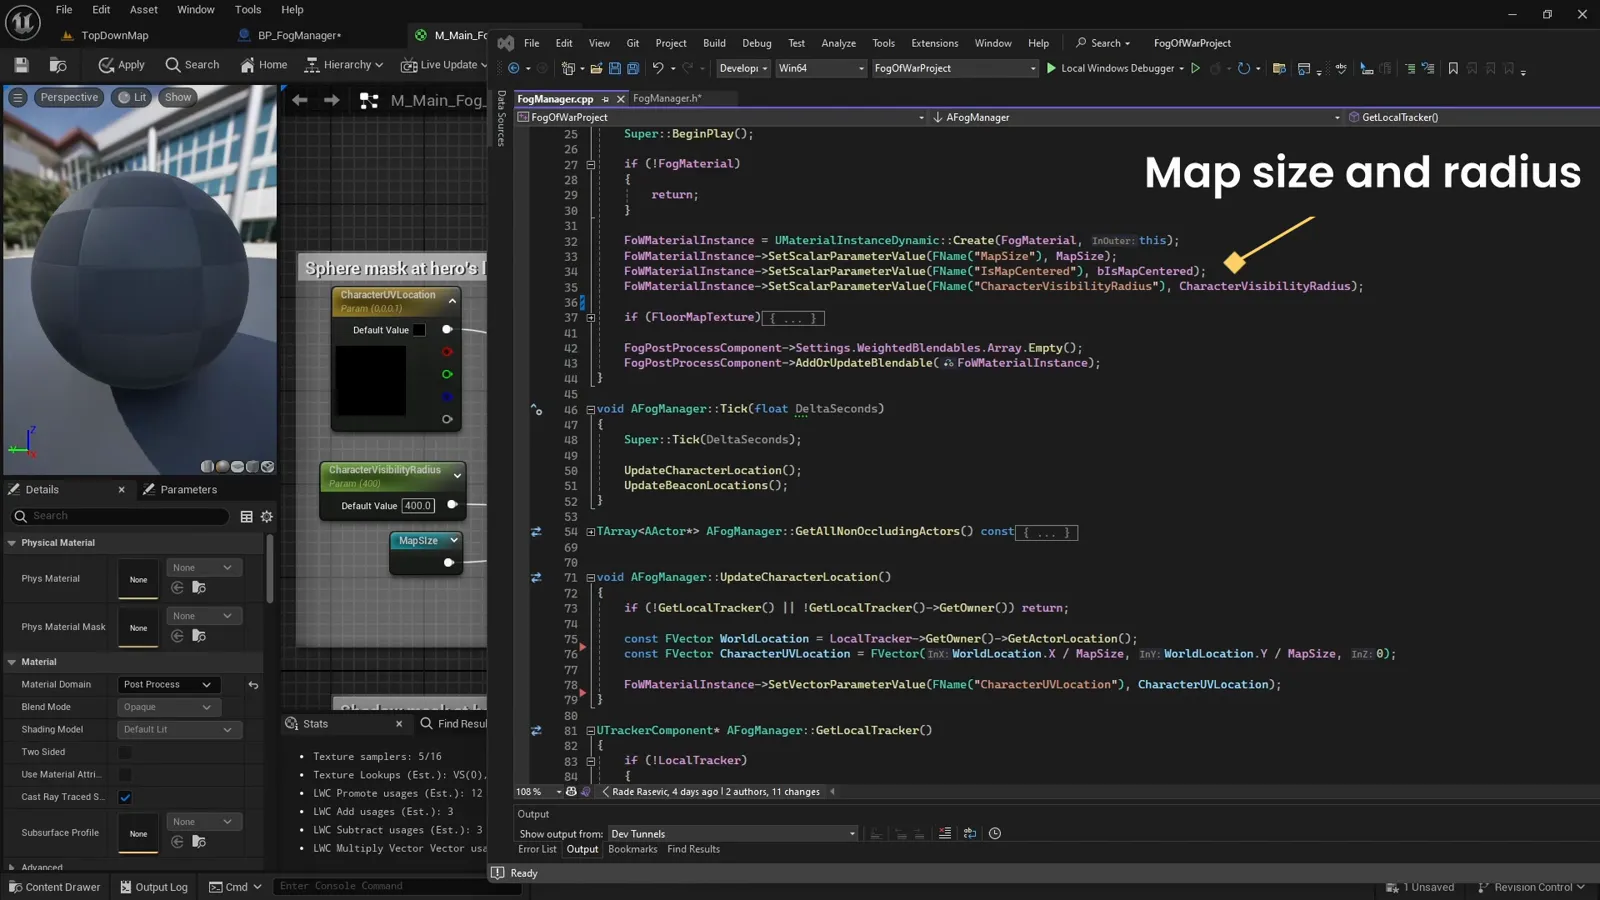
Tick: feeding the player’s normalized location
Every tick, we send the current location of the locally controlled character to the fog material. Materials and textures mostly work with normalized values between 0 and 1, so we divide the character’s world location by the world size to get a normalized value before passing it in.
The fog material
Back in the fog manager, we can now look at the fog material itself. At its core the material comes down to three things: a dark shadow color, a regular (lit) color, and a mask that decides what is dark and what is light.
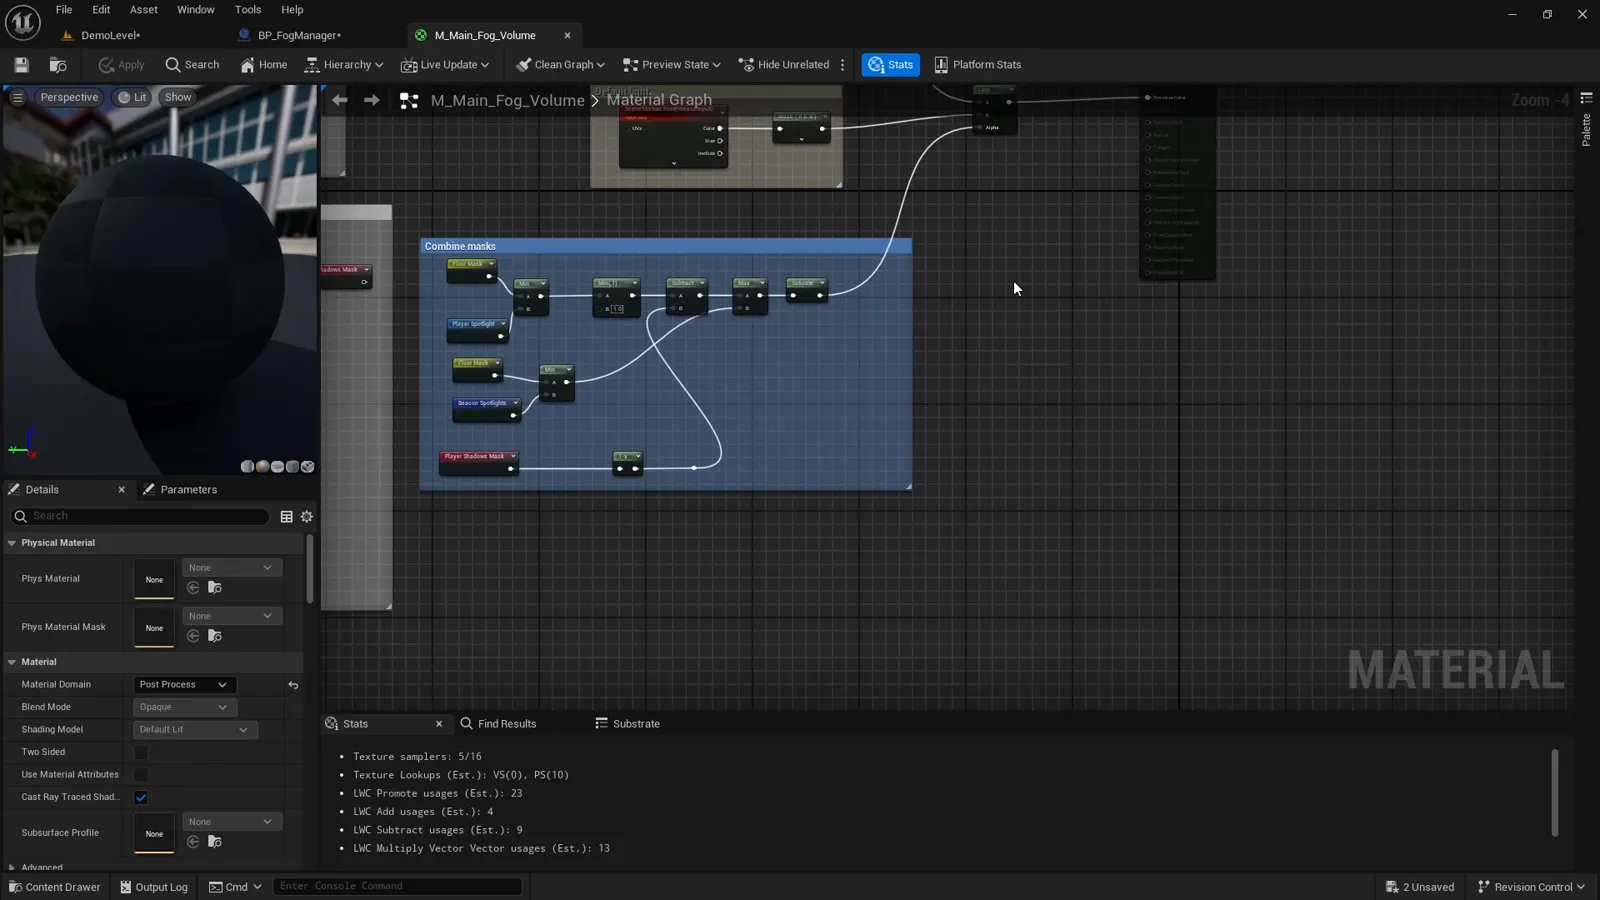
How the masks combine
That mask is really several black-and-white masks combined together. It only returns white for the parts of the map that can receive light, and where either the local player or one of their beacons is at the moment.
To keep this video concise, we focus on the two primary masks first: the floor mask and the player spotlight. The more complex ones, such as beacon spotlights and the player shadow mask, come in later videos.
The floor mask
To understand the floor mask, we switch to another map. Here we have a floor where only the dark gray parts are walkable by the player. We do not want the non-walkable parts to receive light.
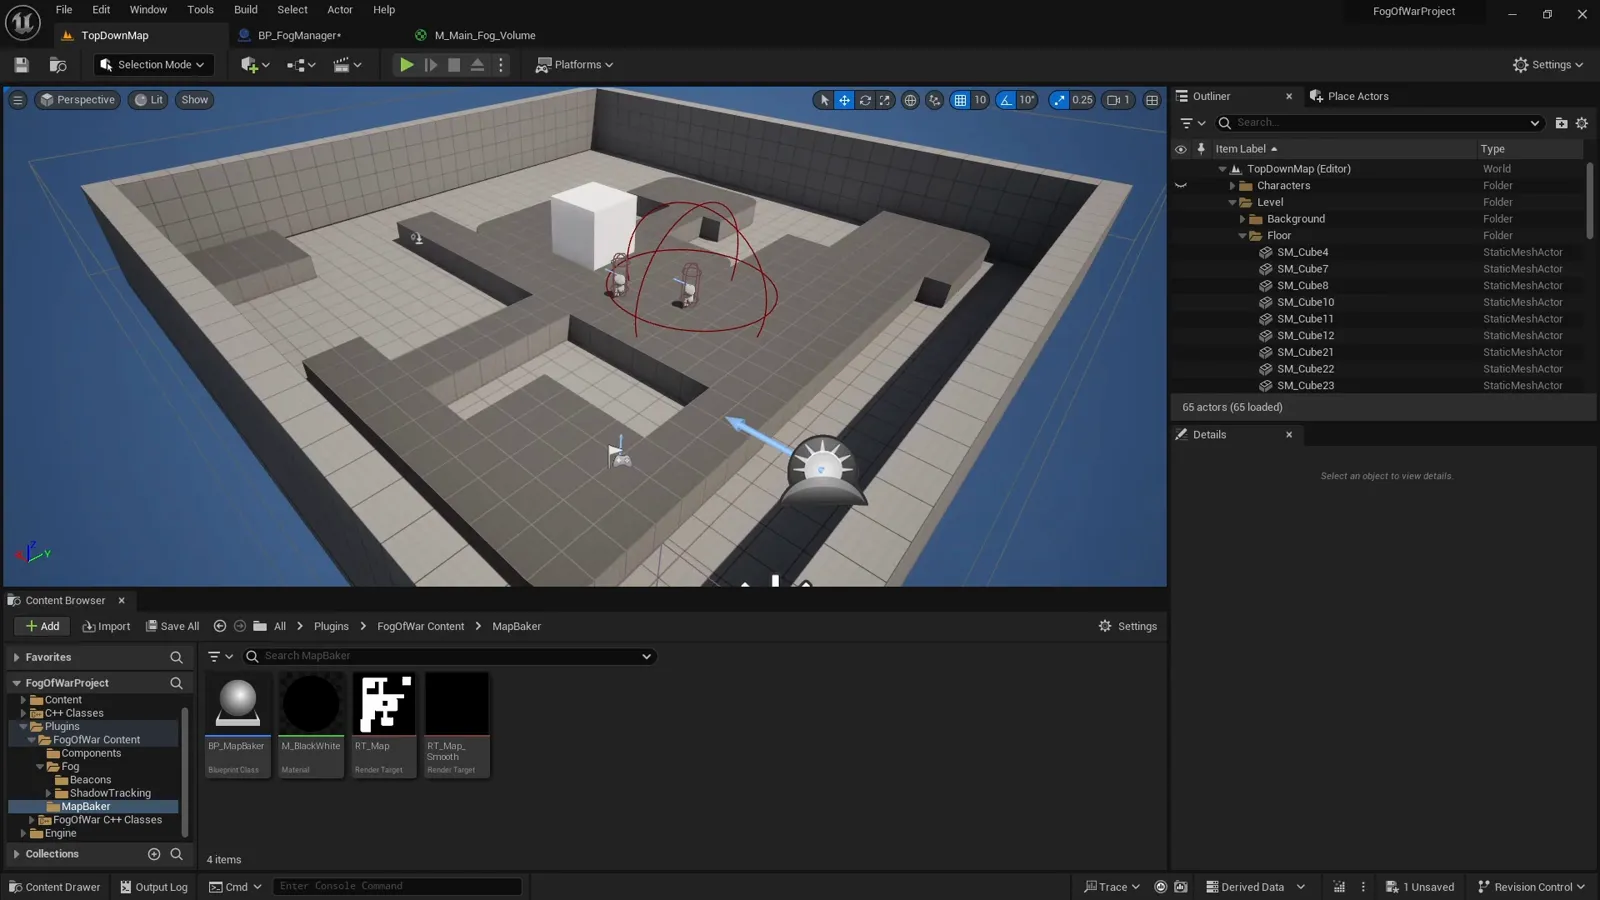
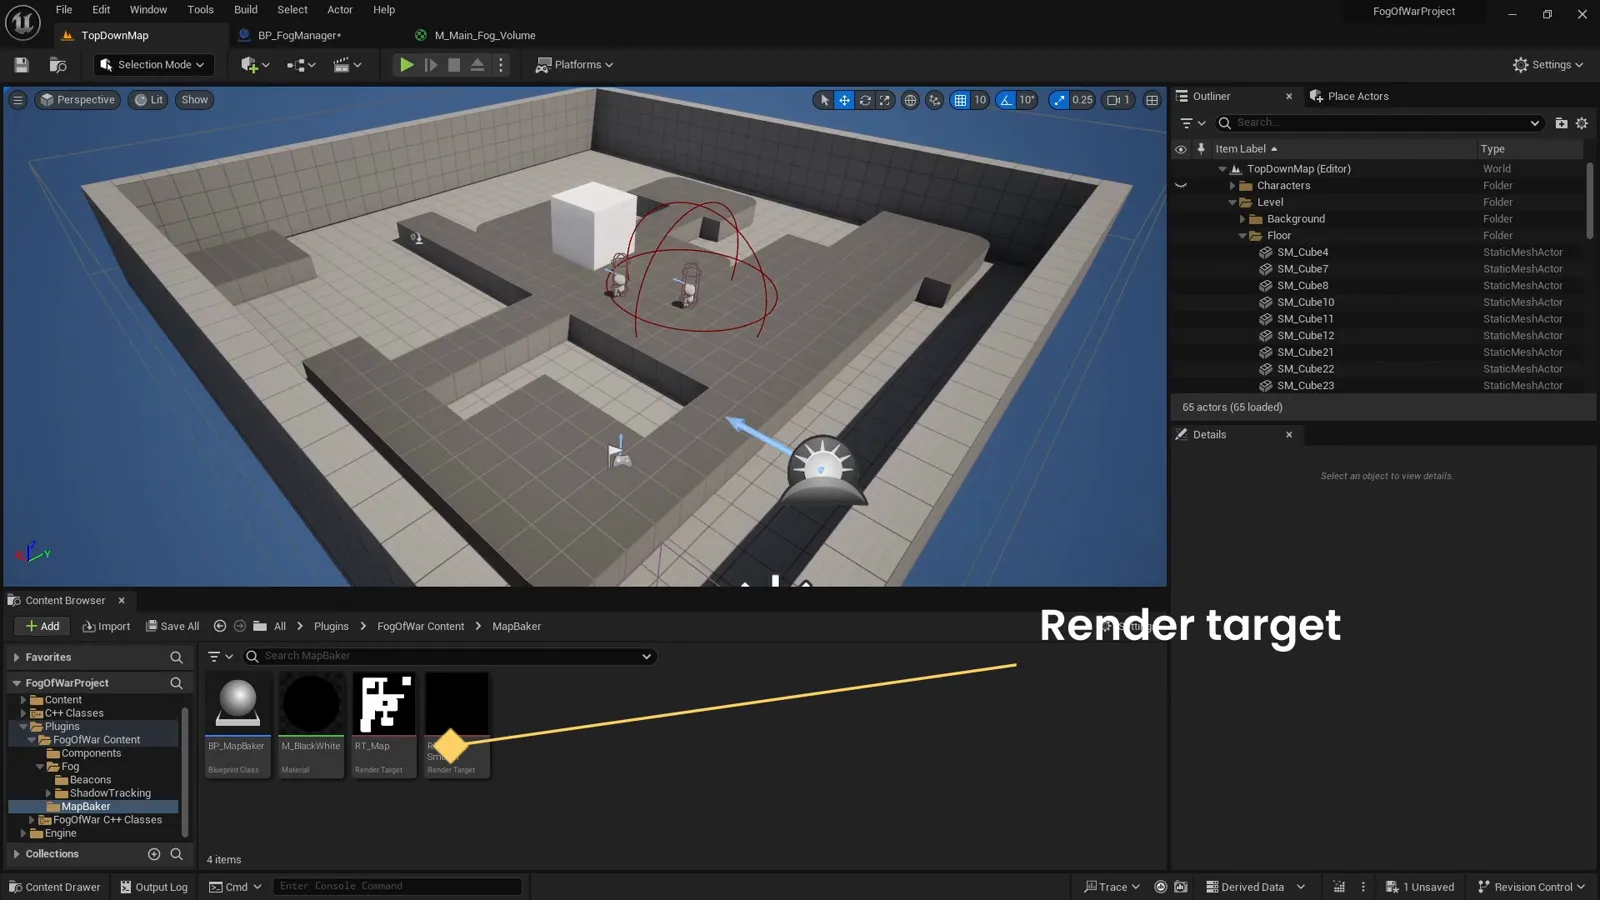
The walkable render target
We have a render target that returns a black-and-white mask of this map, where only the walkable floors are white. (How that mask is generated is covered in a related video.) We apply this as the floor mask in the fog material.
Sampling the mask in normalized space
In the texture sample node we read the mask’s pixels in normalized coordinates between 0 and 1. In the pink part of the graph we take the world coordinates and divide them by the map size to normalize them the same way.
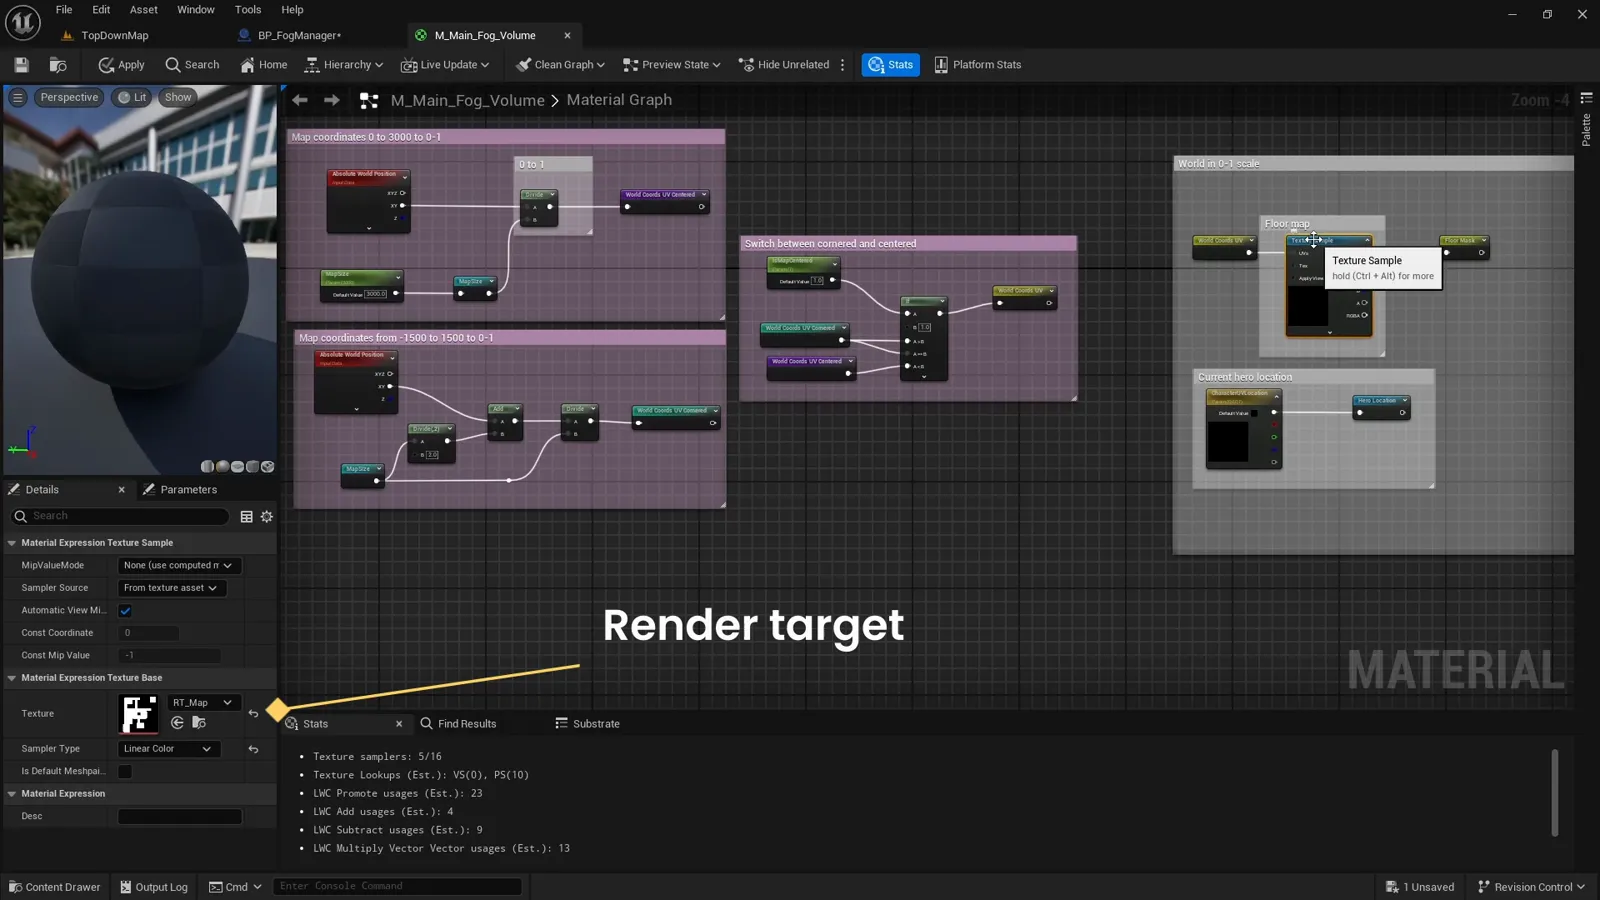
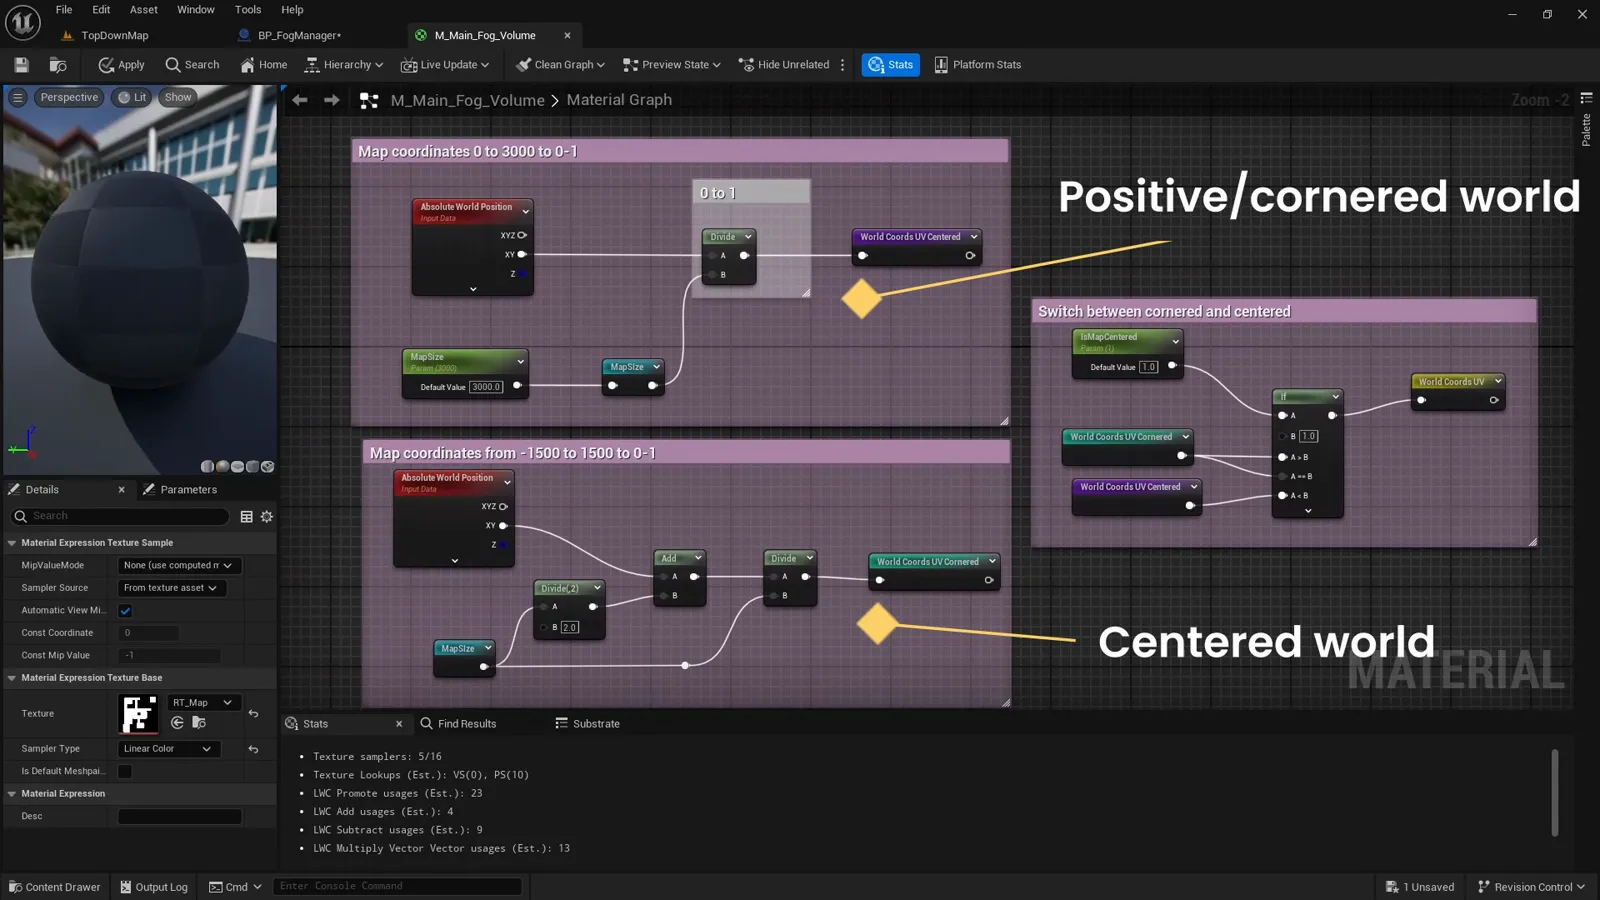
Two kinds of world origin
We handle two kinds of world here. In the first, the coordinates are always positive, so we simply divide the pixel’s absolute world position by the map size to get its location in the 0 to 1 range.
In the second, the coordinates run from a negative value to a positive one. We do exactly the same thing, but first we add half the world size to shift the pixels from a minus 0.5 to 0.5 range up into the 0 to 1 range.
Output to a Named Reroute
Finally, we output the floor mask to a Named Reroute node (a “portal”), which we later use in combination with the rest of the masks. Named Reroutes keep the graph readable instead of dragging wires across the whole material.

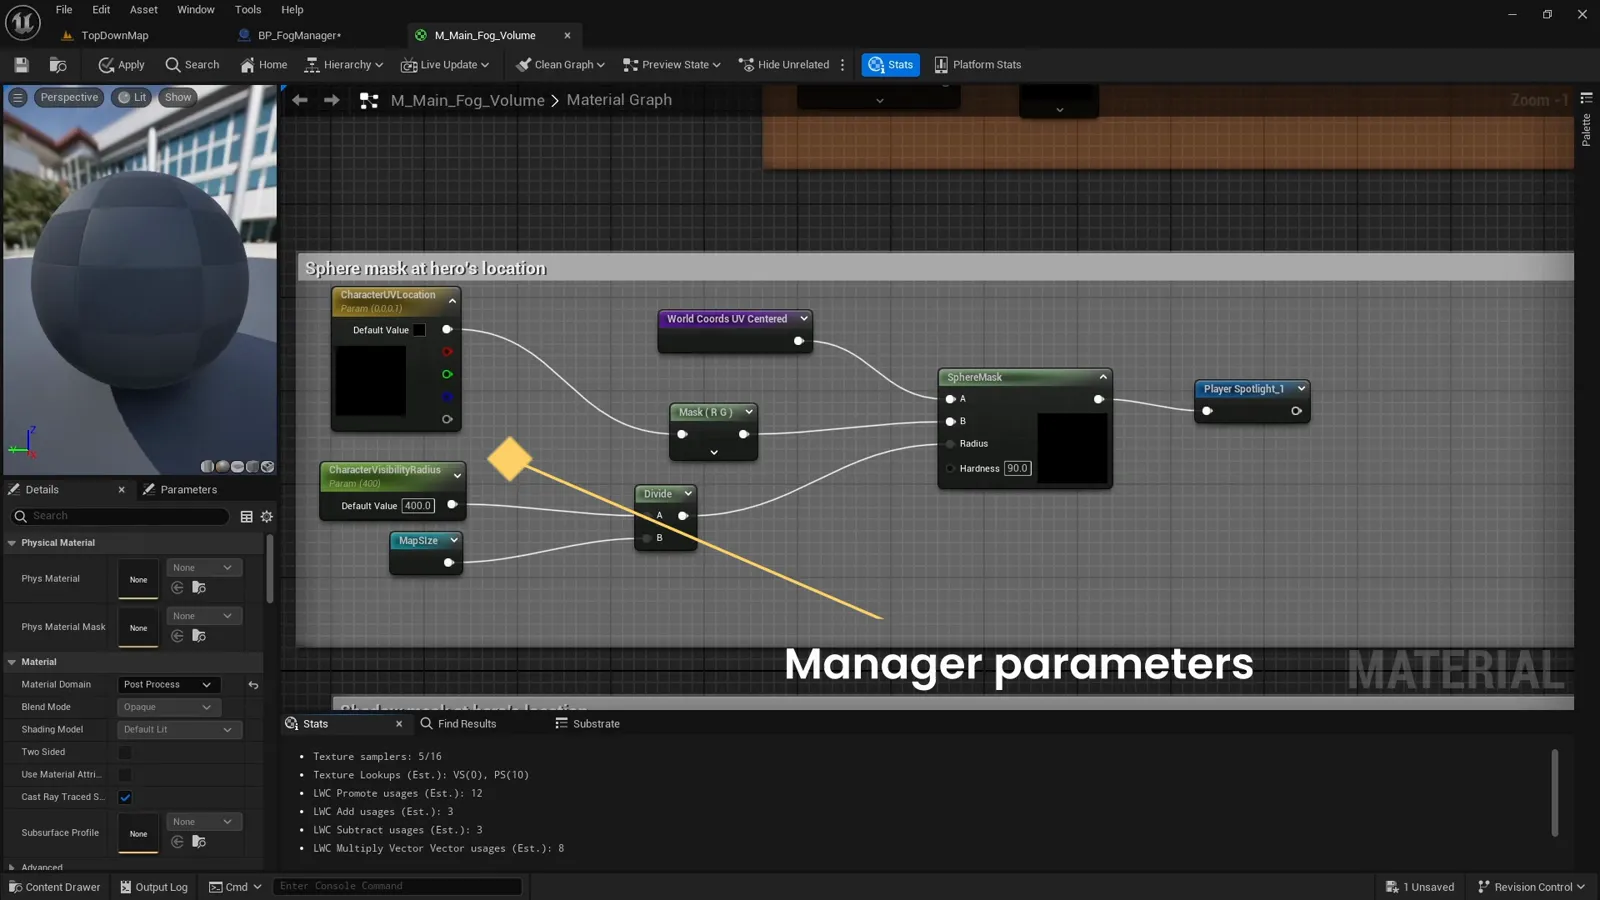
The player spotlight
A quick refresher on how the data flows: the Fog Manager communicates world
information to the fog material. In BeginPlay it sends the map size and the
character’s visibility radius, and in tick it sends the character’s UV location.
The material reads those parameters back out.
From those parameters we build a black mask with a single white sphere at the character’s location. Just like the floor mask, we output it through a Named Reroute so it is ready to combine with the others.
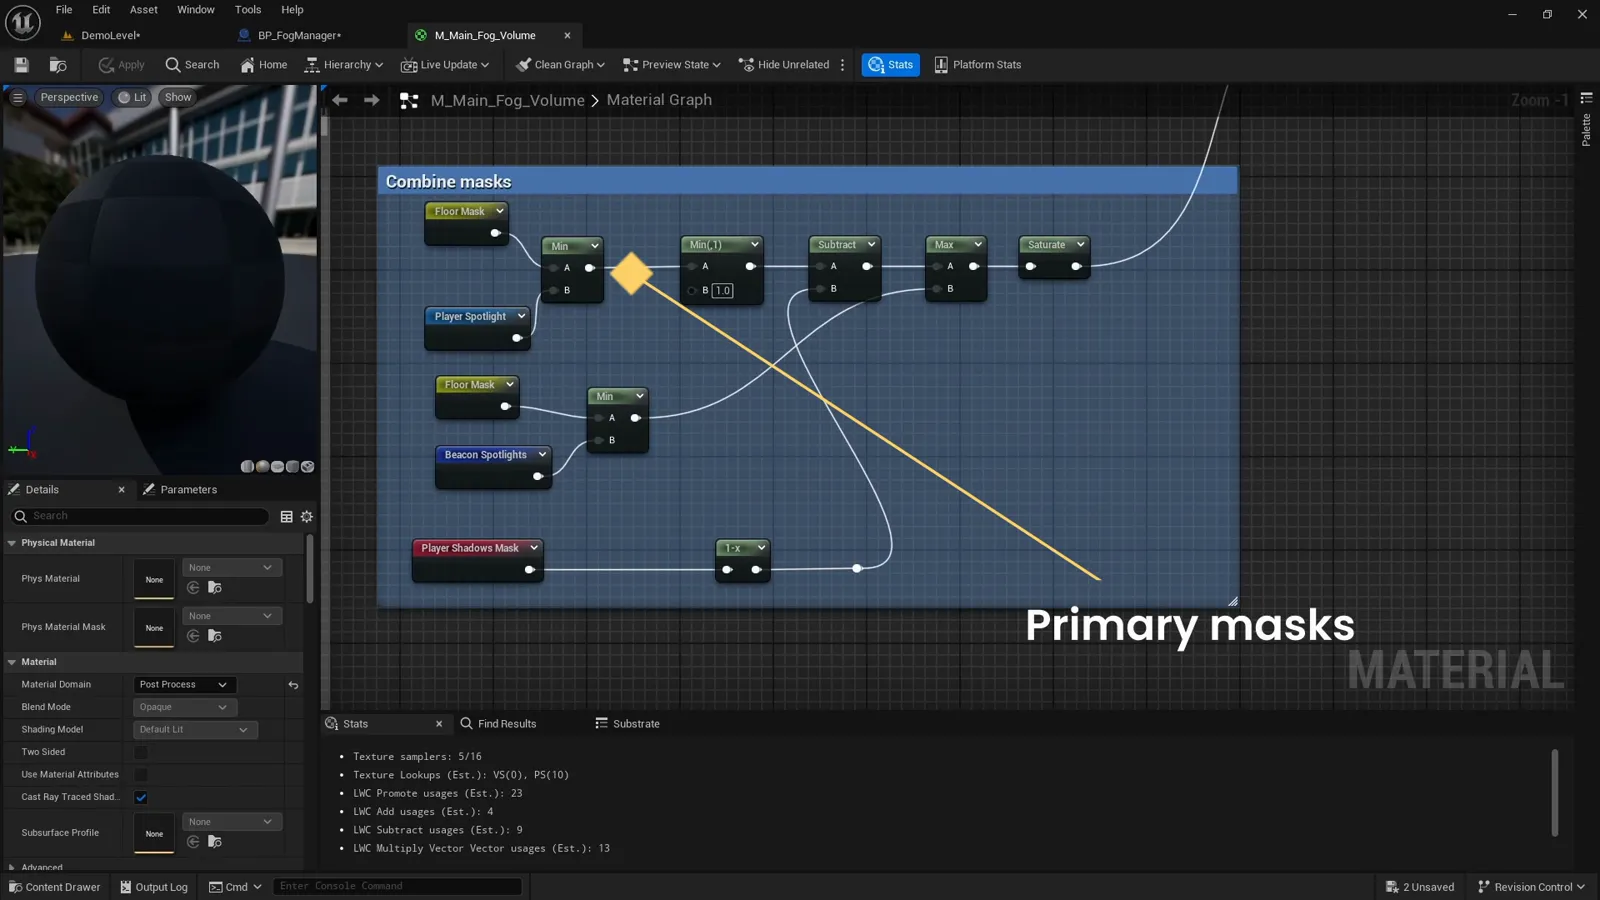
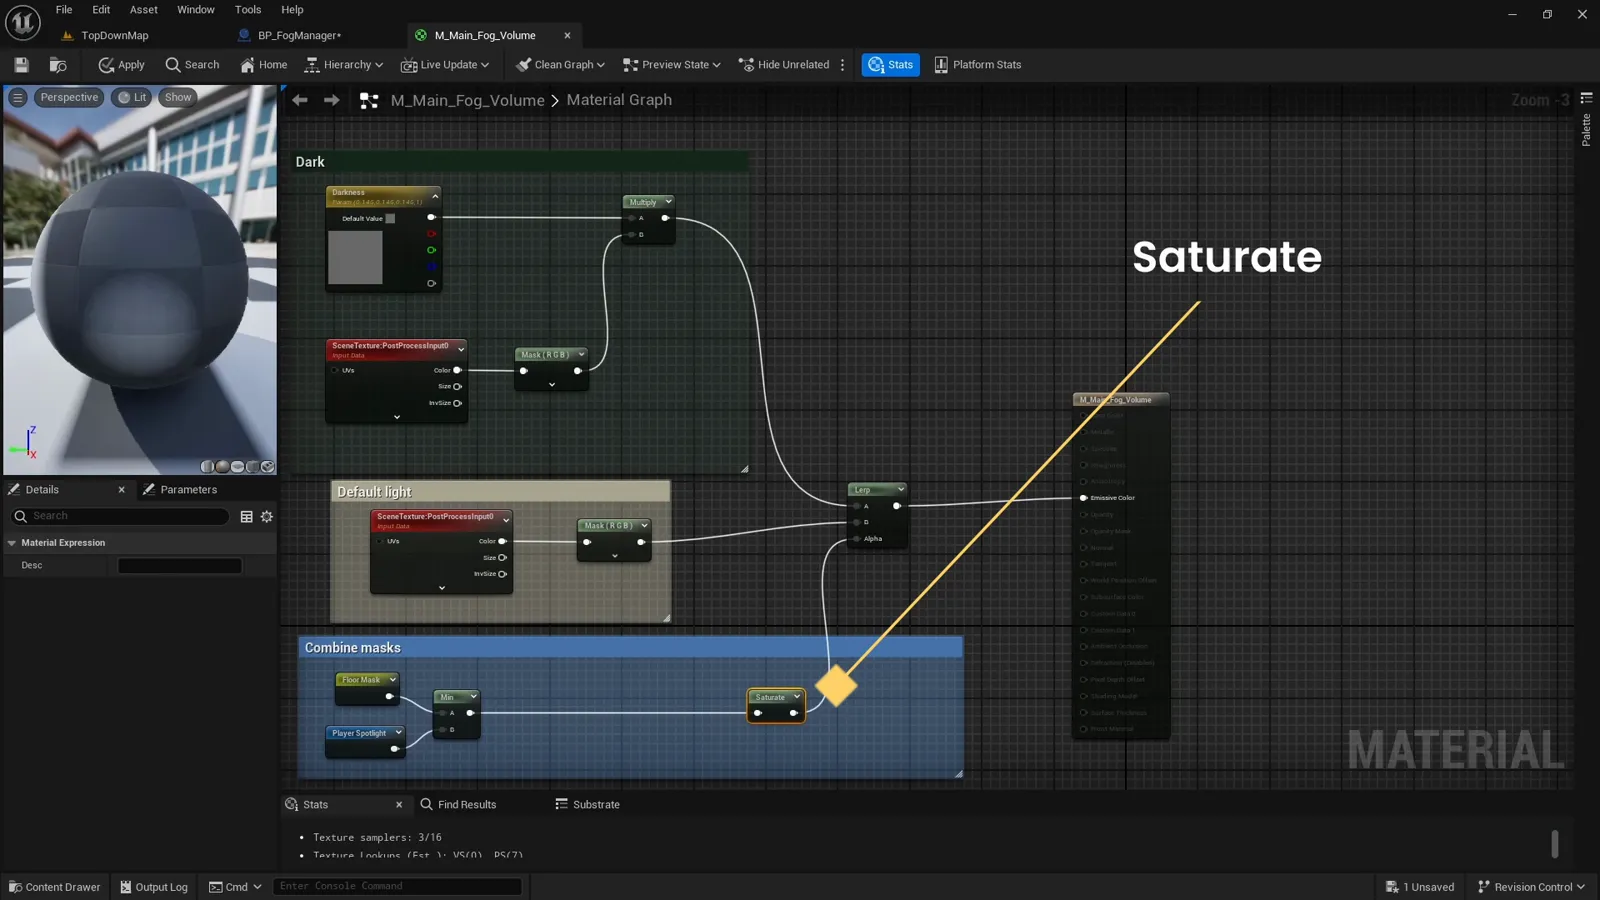
Combining the masks
Now that we understand the floor mask and the player spotlight, we can combine
them to create light around the player. We use a min node so that a pixel is
only white where both masks are white: the player has to be standing on walkable
floor for that floor to light up.
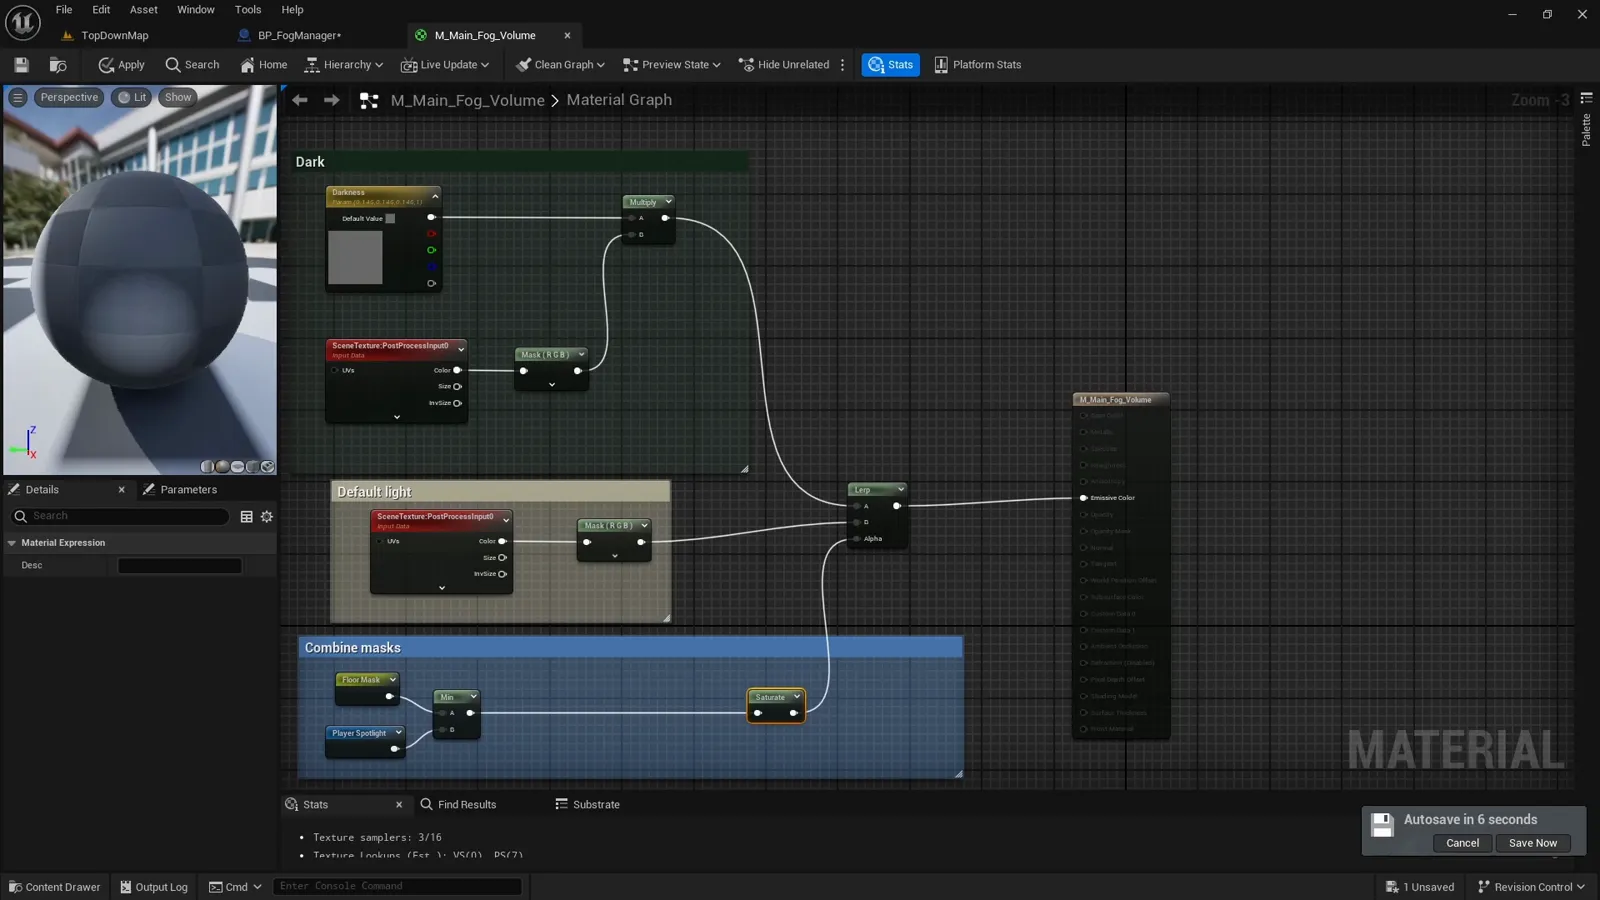
We also add a saturate node to make sure the mask values stay clamped between 0
and 1.
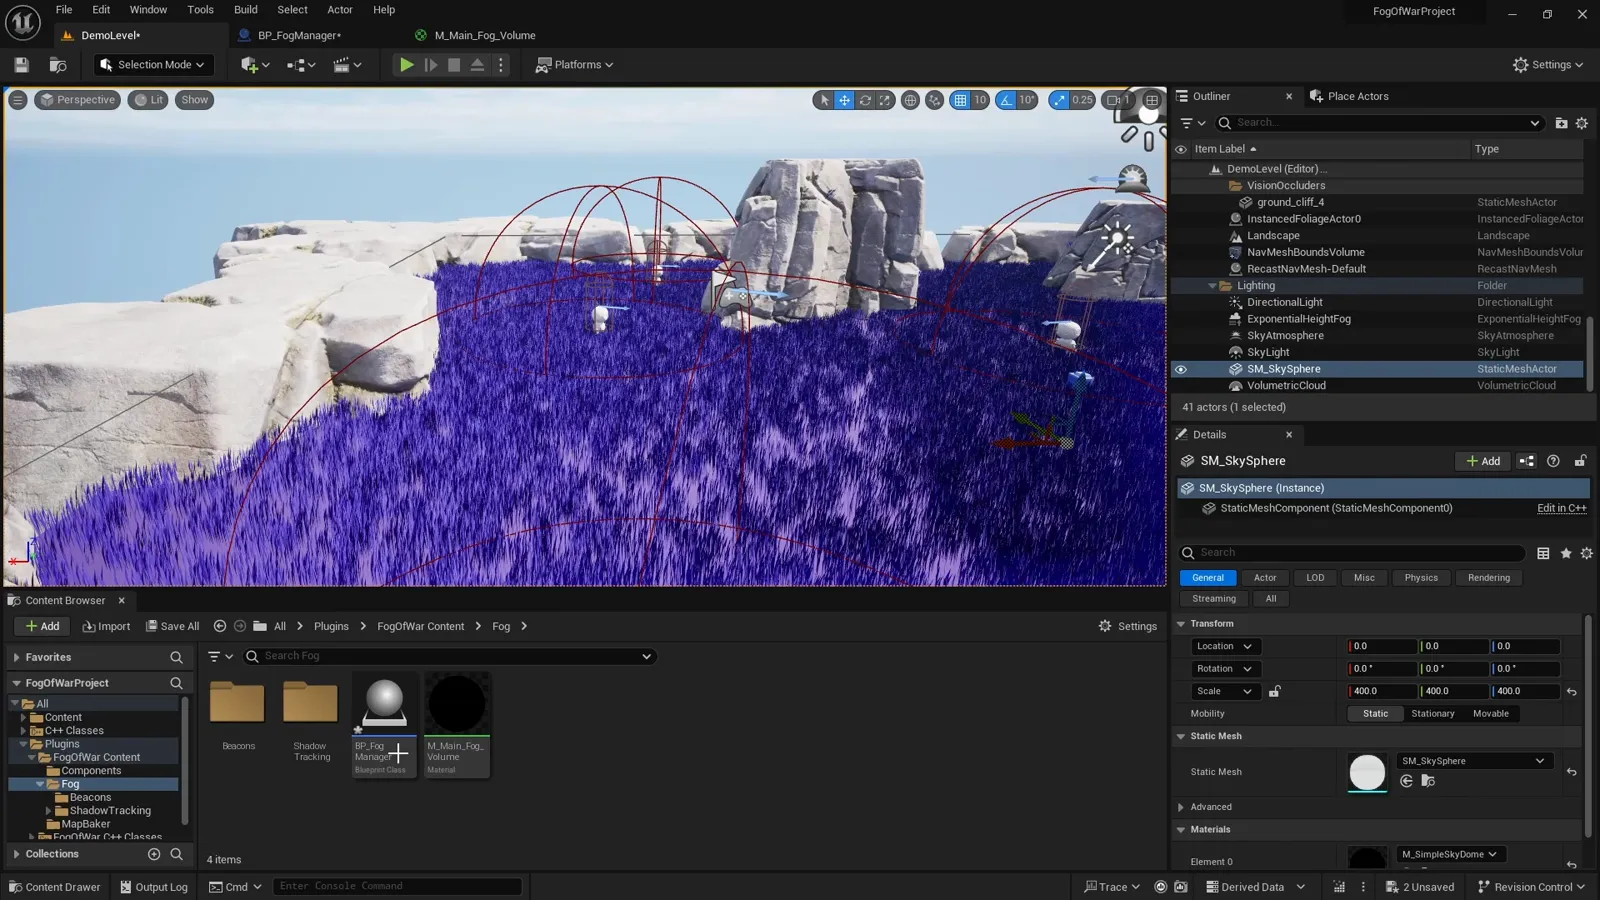
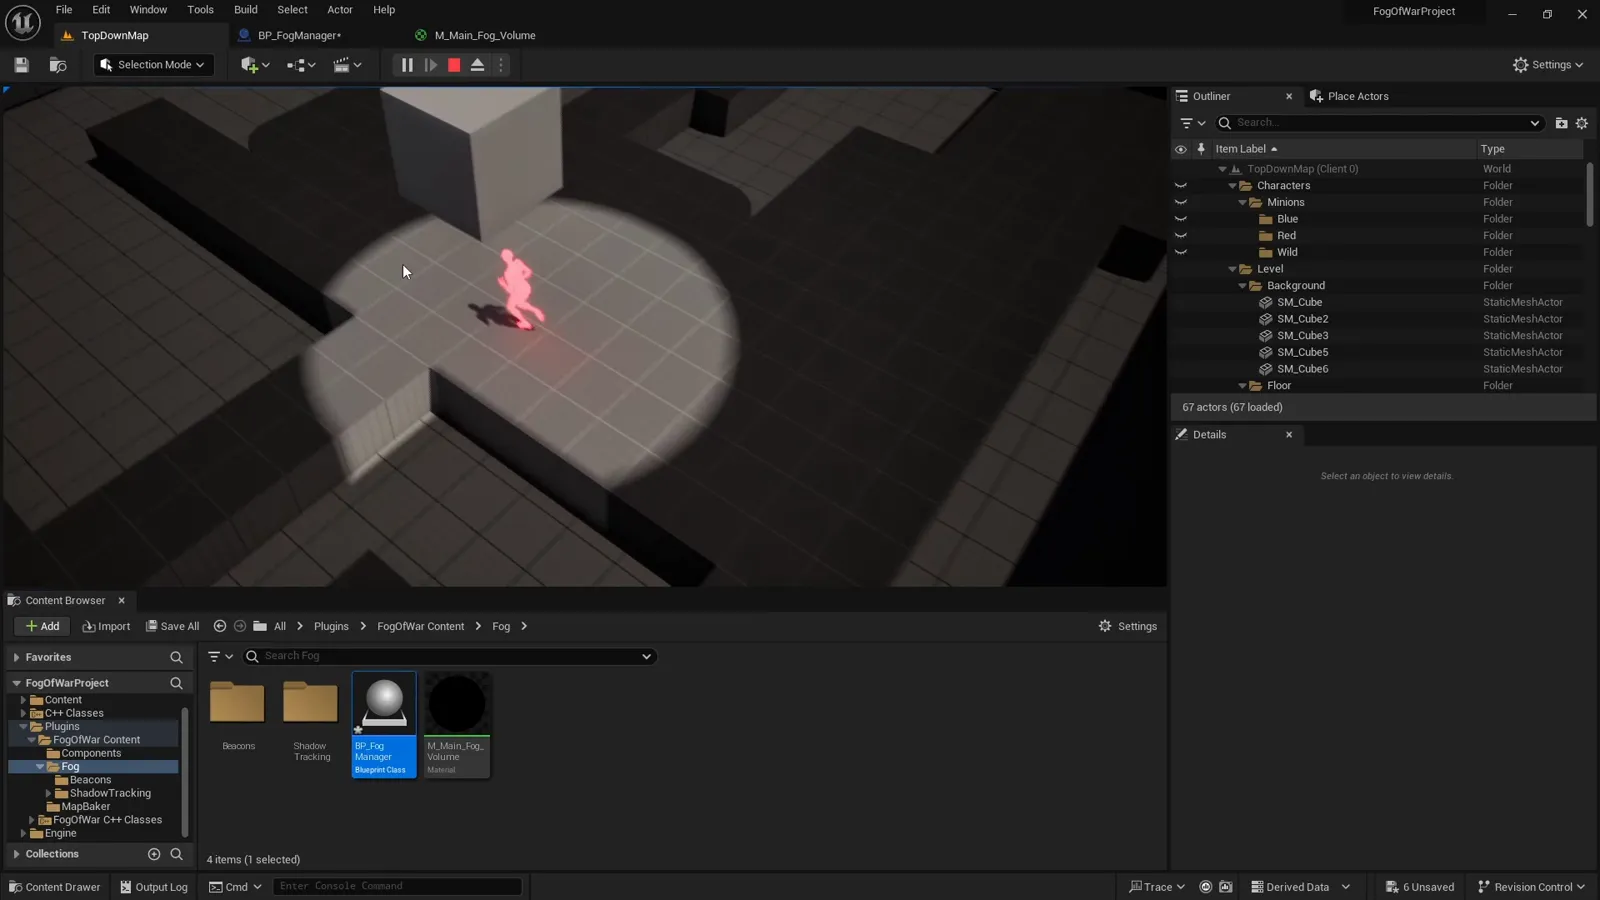
The result
Dropping the Fog Manager into the scene, we now have a simple spotlight that lights the walkable floor around the player’s location.
What’s next
That is the foundation: an unbound post-process volume, a material driven by live world data, and two masks combined into light around the player. In the next parts we go further with the more complex masks, including beacon spotlights and the player shadow mask.
If you would rather drop this into your project ready-made, the Multiplayer Fog of War plugin packages all of this up, replicated and performance-minded, for multiplayer and single-player top-down games.